DIY - My first custom keyboard
This year, I started a very special project for me. During the last couple of years, I tried many keyboards and there was always something. It was too big, too loud, the keyboard layout was odd or whatever. So, I decided to build my own keyboard.

This year, I started a very special project for me. During the last couple of years, I tried many keyboards and there was always something. It was too big, too loud, the keyboard layout was odd or whatever. So, I decided to build my own keyboard.
Requirements
You might say: "Hey, there are so many cool keyboards, why do you want to build your own?" Well, this boils down to my wanted design and some requirements I came up with. I wasn't able to find a device that fulfills my "demands". :)
- white body/case
- tactile switches (yes, I am one of these dudes)
- ISO layout (a standard one w/o special "gaming" keys)
- TKL (meaning: no Numpad, and no re-learning)
- white background light (RGB is fine, but I will use white only, most likely)
- no weird software required (still on Linux)
- no weird drivers required
Finding a keyboard that fits the above, is pretty tough. So I came up with the idea to learn something new and build/mod my own. For sure, this was also an opportunity to feed my internal geek.
Oh, if you are interested: Until now, I was using a "CODE Keyboard" from WASD Keyboards. The price and shipping policies to Germany are… meh at best. They do have a TKL version, but it's $185 + taxes + import.
Some learnings
After I decided that I want to build something, I needed to learn how to do this. Searching for custom keyboards, bare-bones and switches brought up a completely new world.
I learned new words like "thock", "ping" or "clacky". These are describing different sounds of a keyboard and its switches. After testing some switches, I slowly understood what's meant here.
I also learned, that there are way more vendors that specialized in keyboard switches than Cherry. Have you ever heard about Akko, Gateron, Kailh or Glorius? I haven't.
And "Ooouf", the prices are skyrocketing, the more a part is valued. There are bare-bones (basically empty keyboard cases with a PCB), that cost €300 or switches where a set of 70 costs over €100.
But then, I learned about modding. One can take a pretty standard keyboard and tune it to the own liking. For a beginner like me, this offered a nice price-value ratio, but also more learnings. Yay. :)
Parts
Deciding about the parts was a pretty longish task. It took me almost 2 months, just to choose what I want and order everything.
Base
After learning about modding and searching for fitting bases, I stumbled over the CIY X77. It is a pretty cheap keyboard, but delivers some cool features.
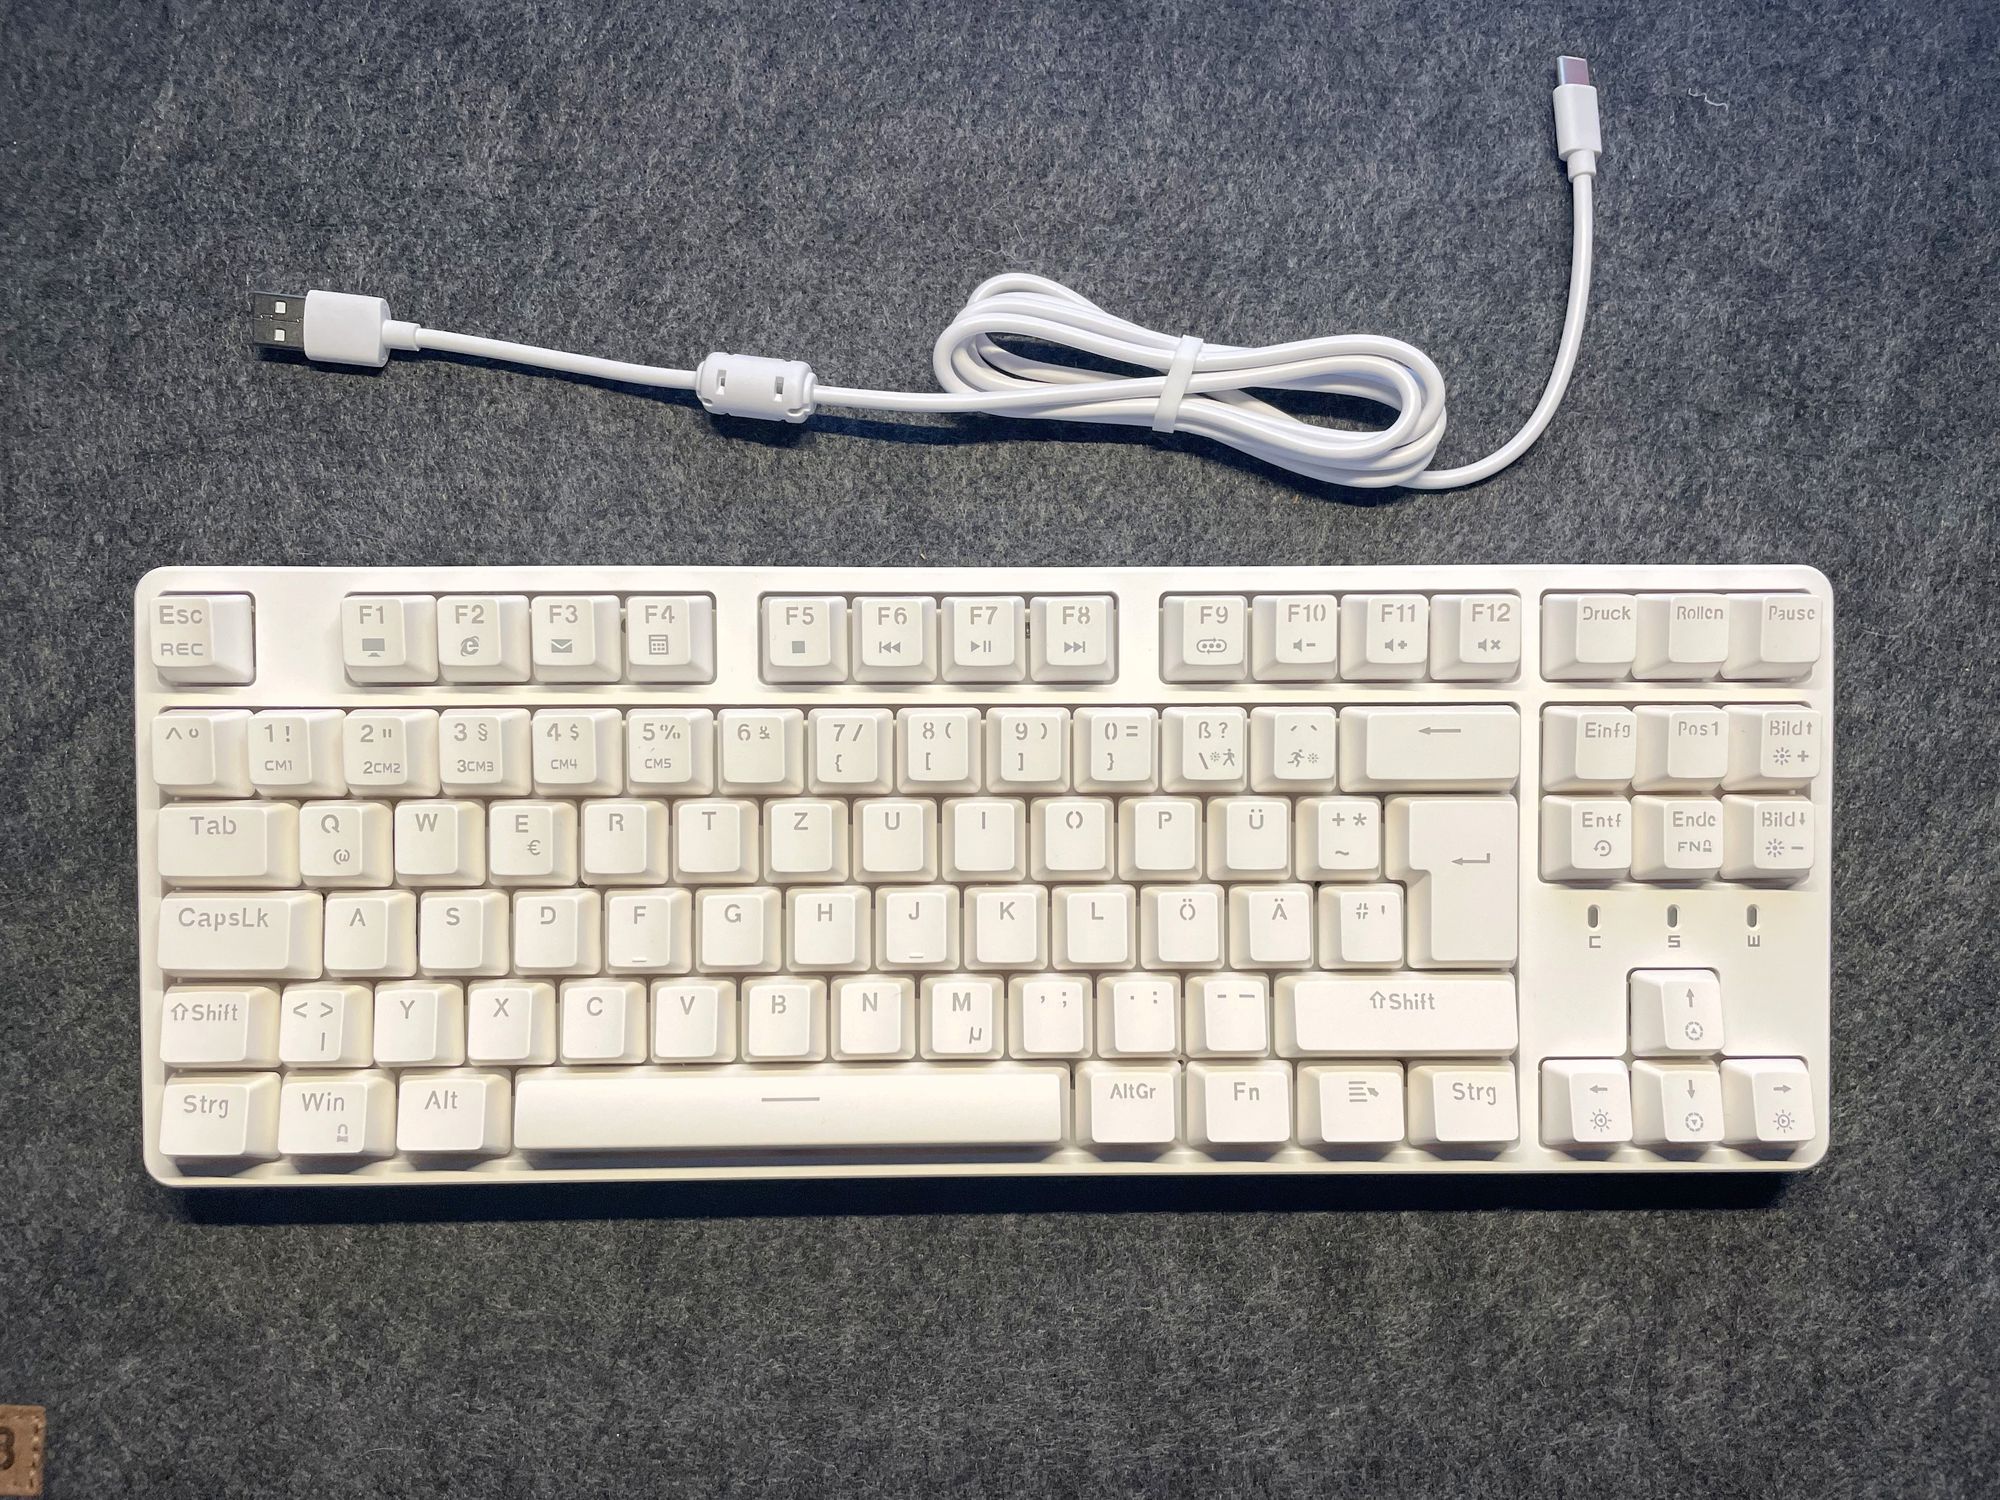
- white base
- Aluminum switch plate
- hot-swappable switches
- 3 or 5 pin switches
- TKL layout (no Numpad)
- ISO key layout (88 keys)
- RGB lighting, which can be configured via keyboard shortcuts (no software needed)
- USB-C connector
- very large rubber feet
- three angles possible
- magnetic cover
On the other hand, it is cheap… This means:
- it is hollow
- no dampening is included
- ABS keycaps
- gaming font layout
- Awful switches (linear with 40g actuation weight)
But, there are many people that consider it as a very solid beginners' baseline for modding. Since it only costs ~€50, I grabbed one. But, I also needed some more parts to get this thing somewhere.
Switches
For switches, I wanted something that is quite silent and usable in an office environment. I am also used to a bit more actuation force (> 50 cN). Since a silent keyboard has not a lot of feedback, I also wanted something with a haptic feedback.
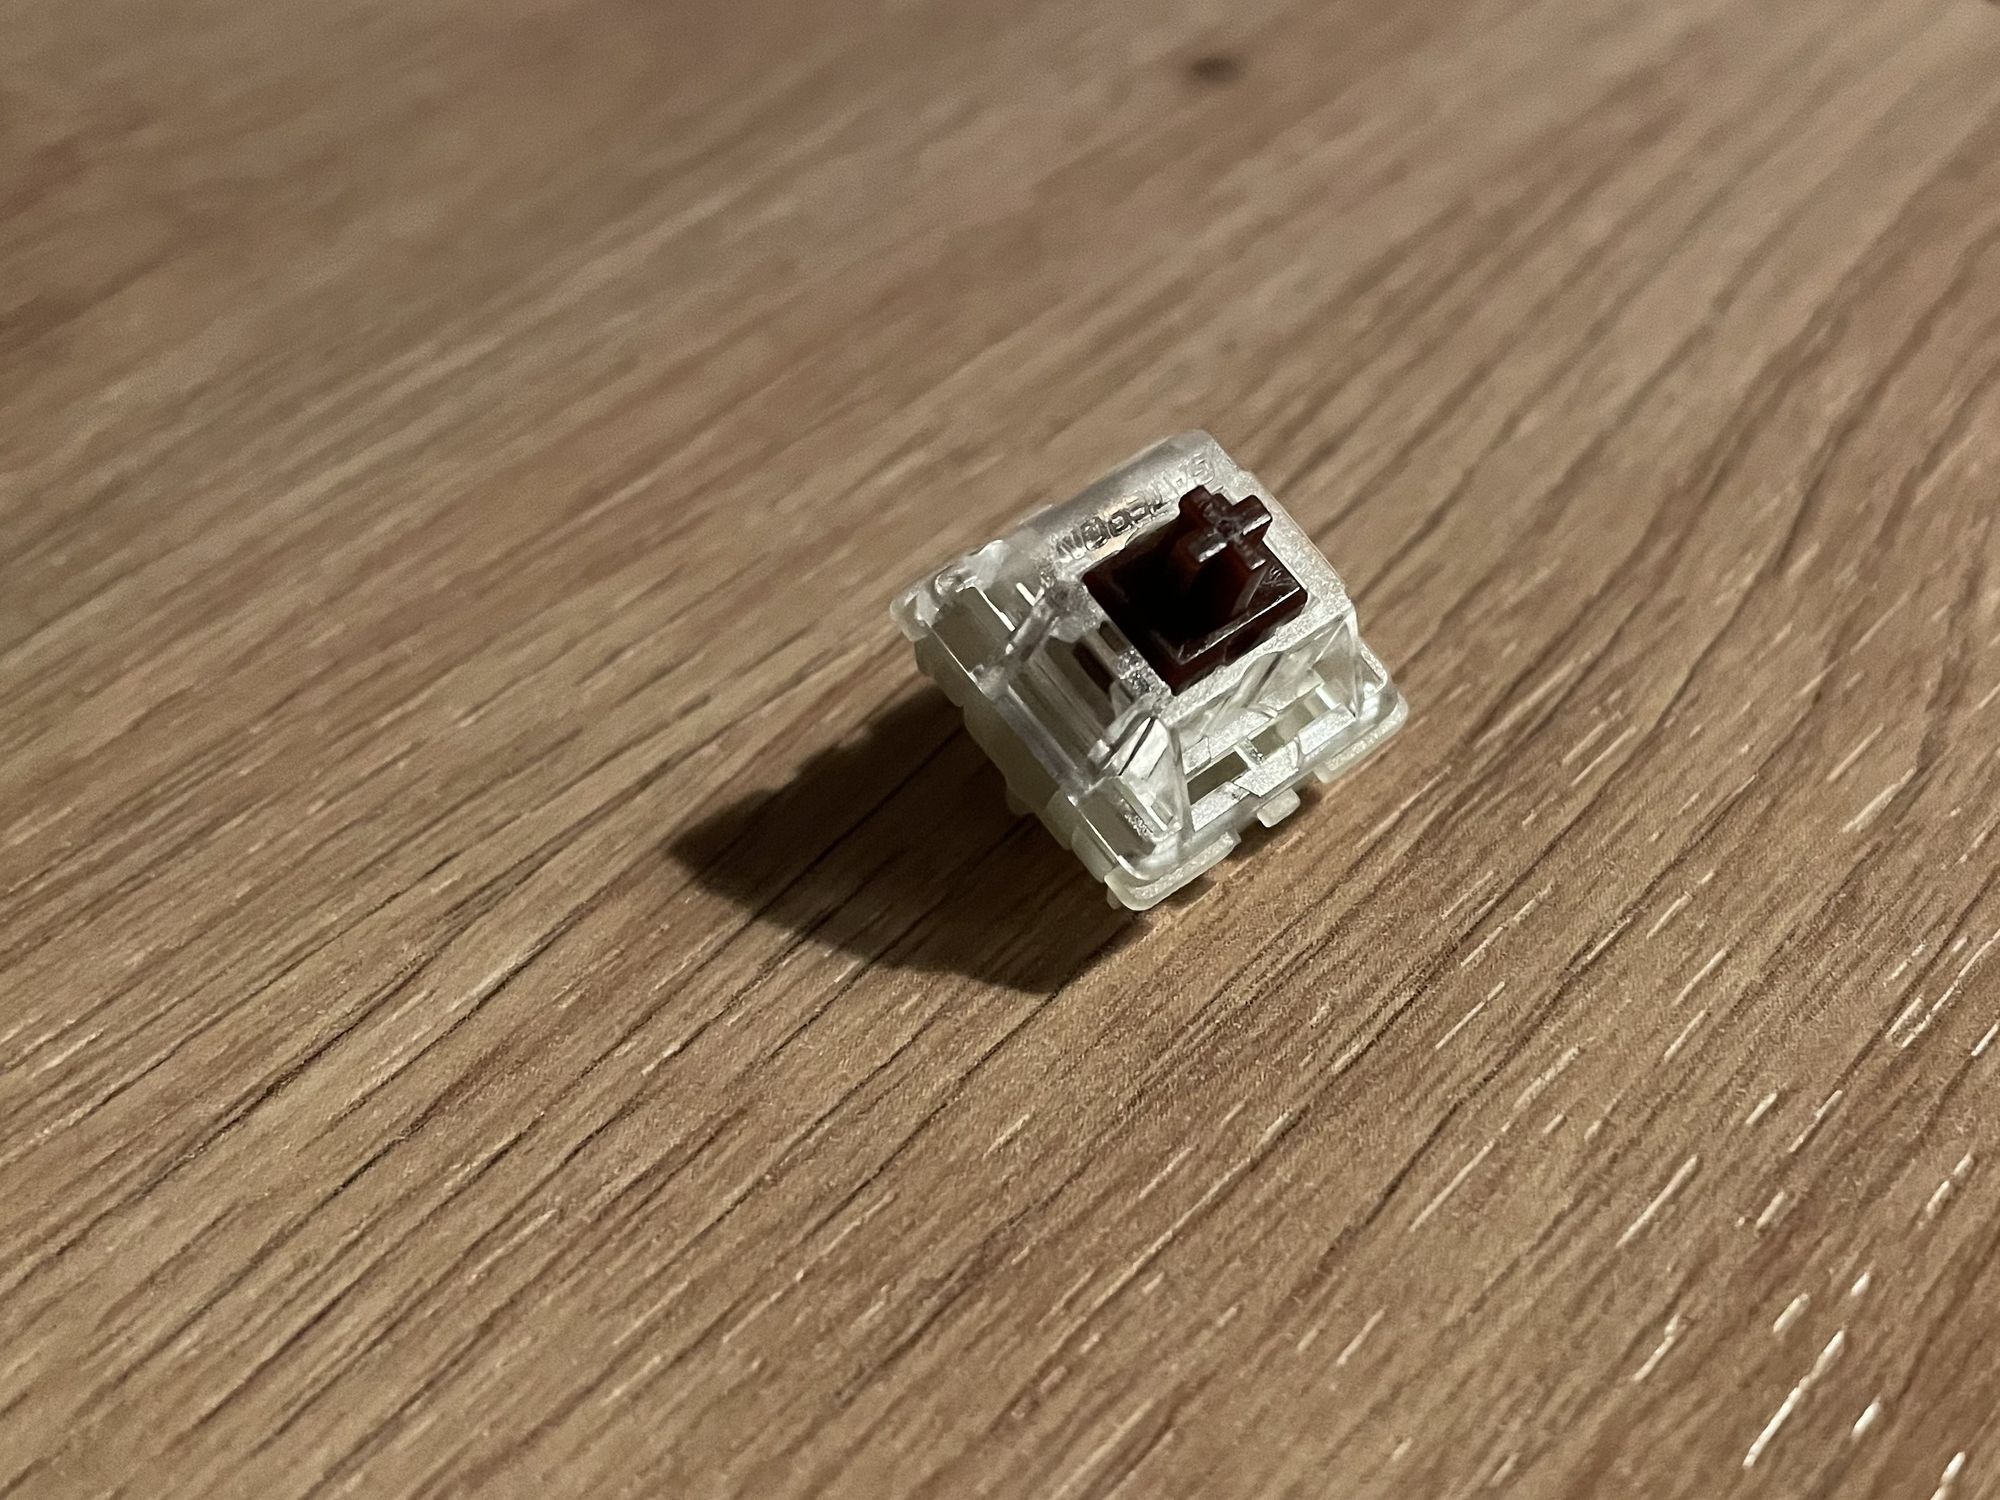
So, I was looking for a tactile, pretty silent switch with a higher actuation force. If it does not cost me a leg and an arm, it would be even better. The Gateron Silent Brown switches seemed like a nice deal.
- Tactile
- 5-Pin
- 55 cN operating force
- silent
- support background lighting
Alternatively, I also ordered some Cherry MX Clear switches, which are my switches until now, but they are not delivered, yet.
- Tactile
- 3-Pin
- 65 cN operating force
- support background lighting
Keycaps
Finding some cool keycaps with German layout is really pain. I really wanted something with an XDA profile, but this is not possible. Well, I also looked for switches that can be used with the background lighting. Having two colored switches would be a huge plus (maybe green+white or black+white).
Aaaand, this is not possible. Anyway, there was something that seemed reasonable.
Corsair recently released some PBT double shot keycaps with German ISO layout. With ~€30 it also priced reasonably. The font layout is not 100% to my taste, but that's OK for now.
Cable
A minor thing I wanted to fix was the cable situation. I am a huge fan of a clean desk, but wireless, mechanical keyboards are still something rare and odd.
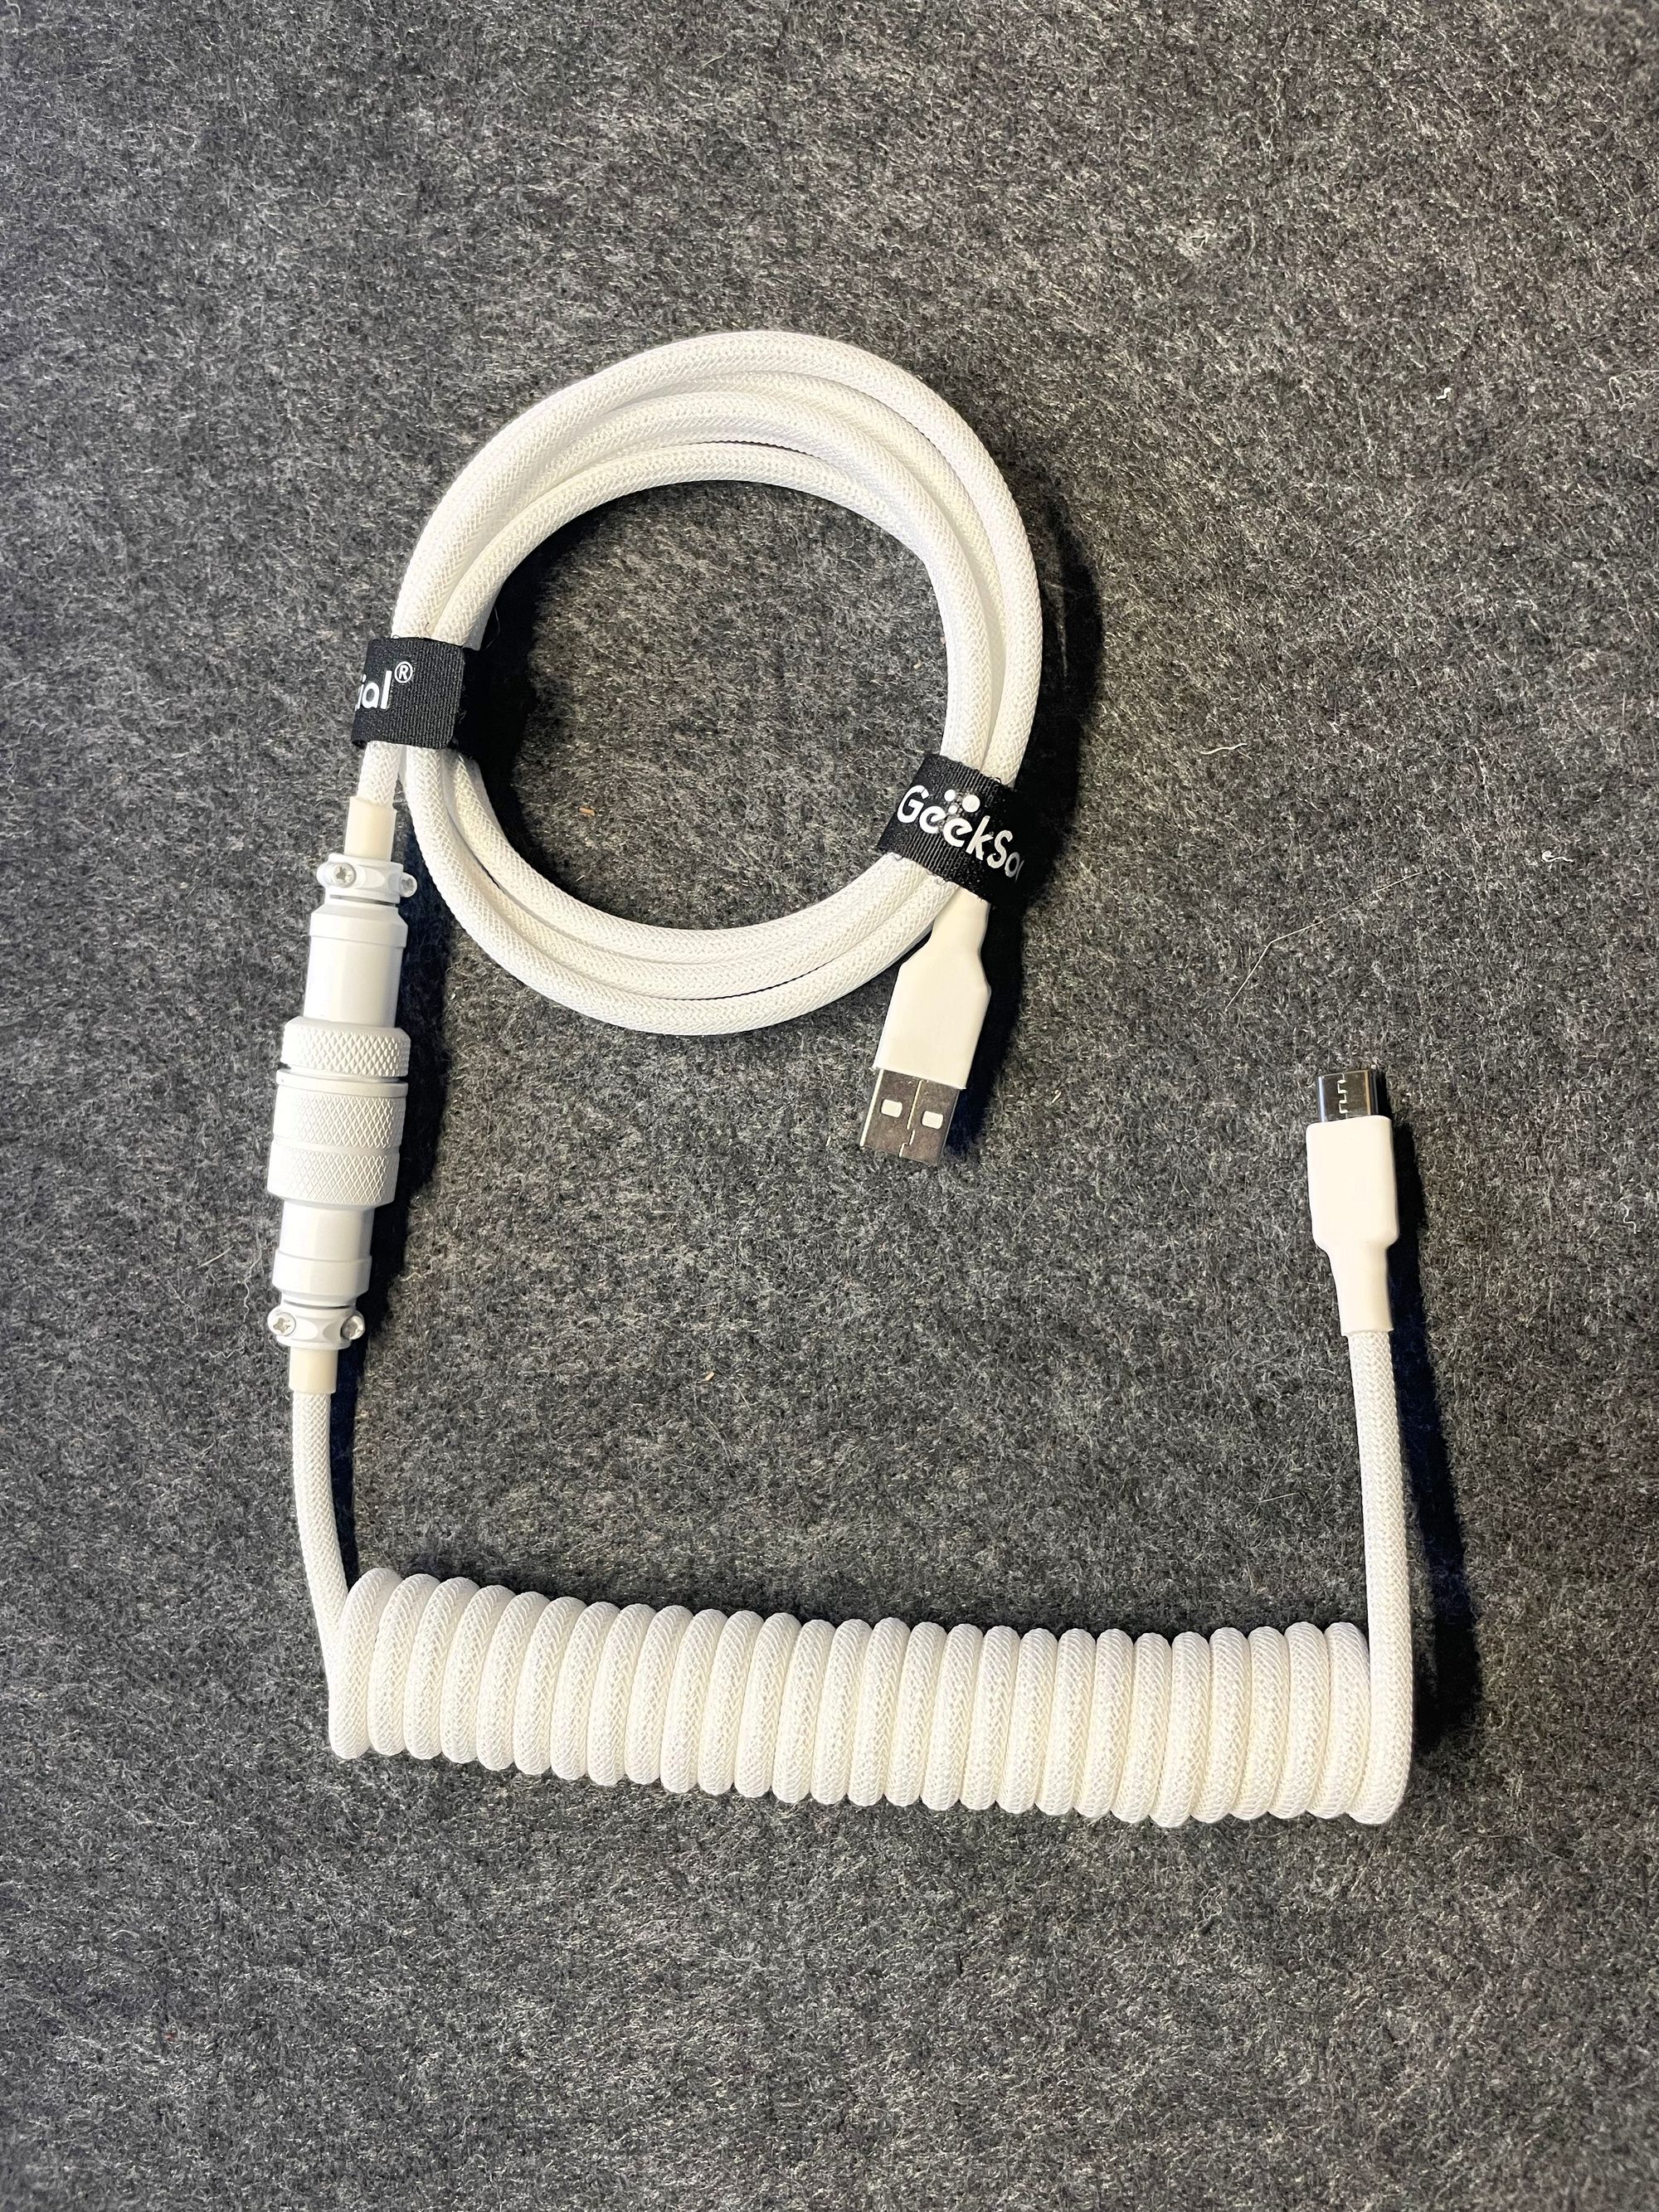
I bought a nice looking, white, braided spirl-cable from Geeksocial.
Modding
Finally, for modding, I needed some other things. These might not be the usual tech-ware, but shall help to enhance the cheap'ish CIY X77 base.
I bought some flat foam material, some painters-tape, sponge rubber a pair of scissors. In addition, a keycap puller, switch puller, a screwdriver, some lube and a small brush.
Build
Now that everything is prepared, let's start with the build and mod of the keyboard.
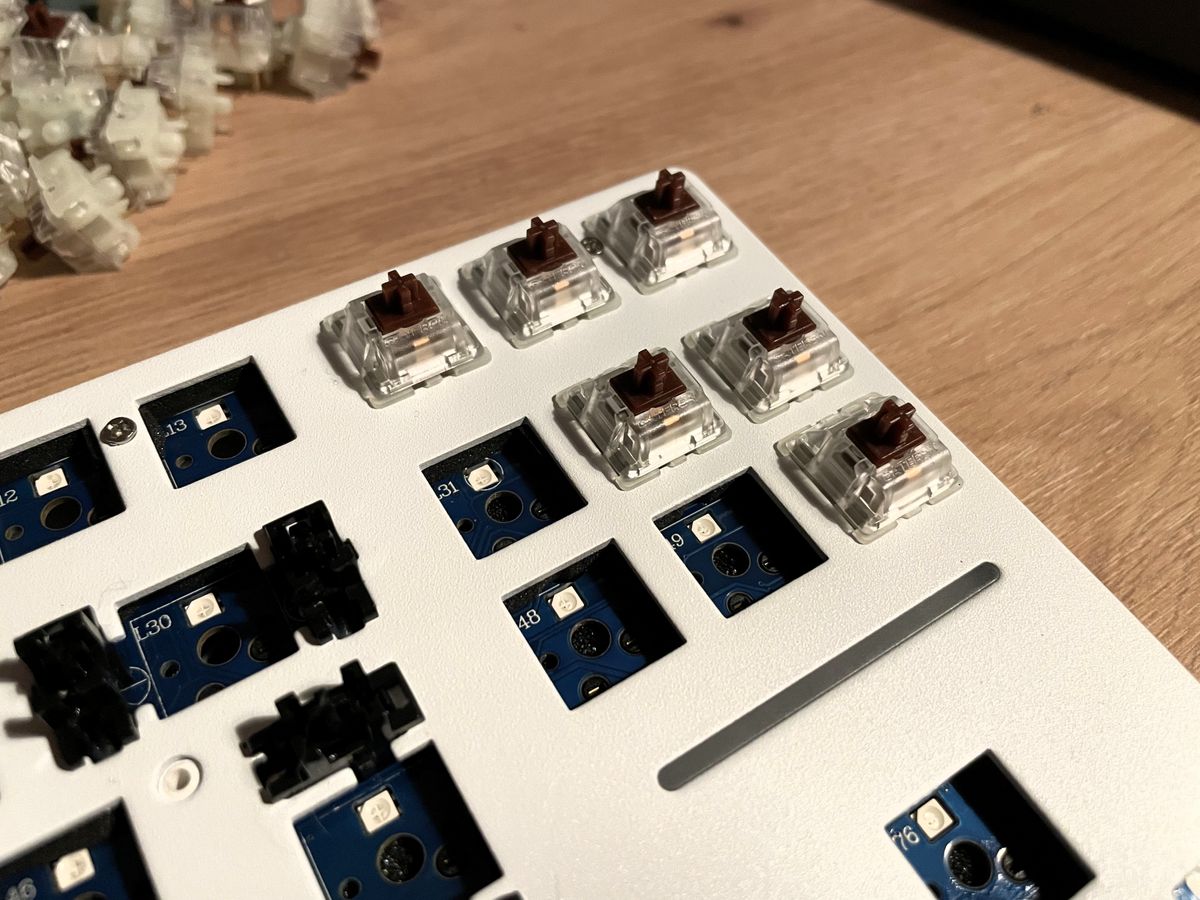
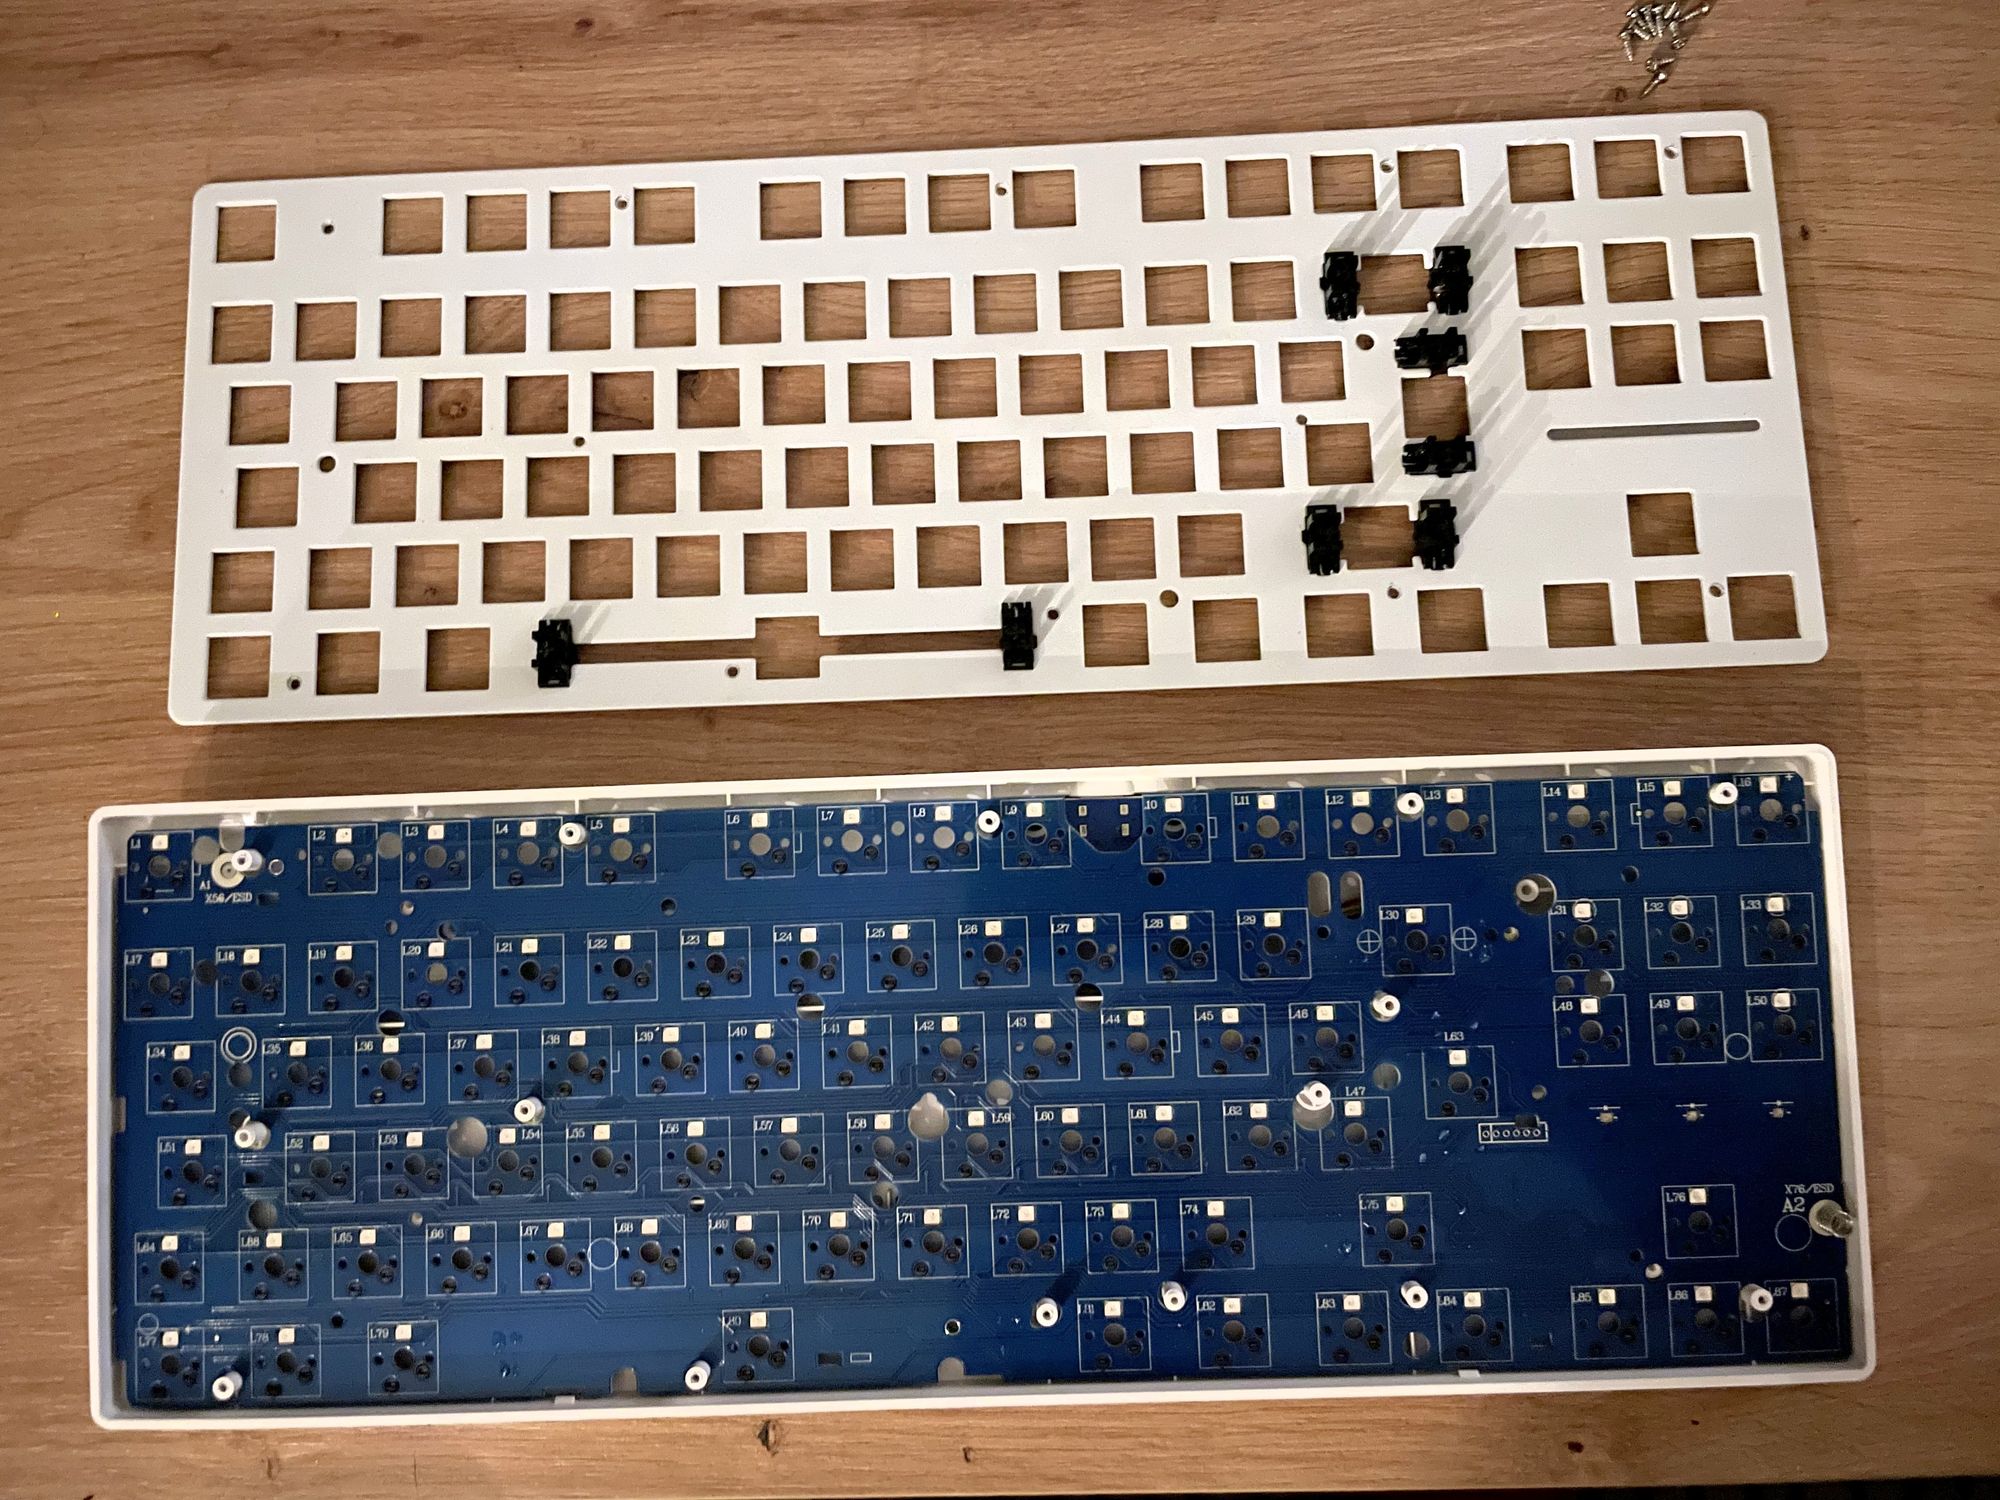
Disassemble
The first thing I have done was disassembling. The cover is magnetic and can be removed easily. Afterward, all keycaps and switches needs to be removed.

Finally, I unscrewed all visible screws and removed the switch plate and PCB. The PCB is attached with a cable to the controller, so I was extra careful here.
Mods and Foam
Now that everything is apart, I can start with the first mods.
Foam Mod
This is a pretty easy one. I just need to cut some foam to pieces and fill the gaps of the keyboard casing with some foam. This will reduce the overall volume of the keyboard and remove some unwanted shattering noises.
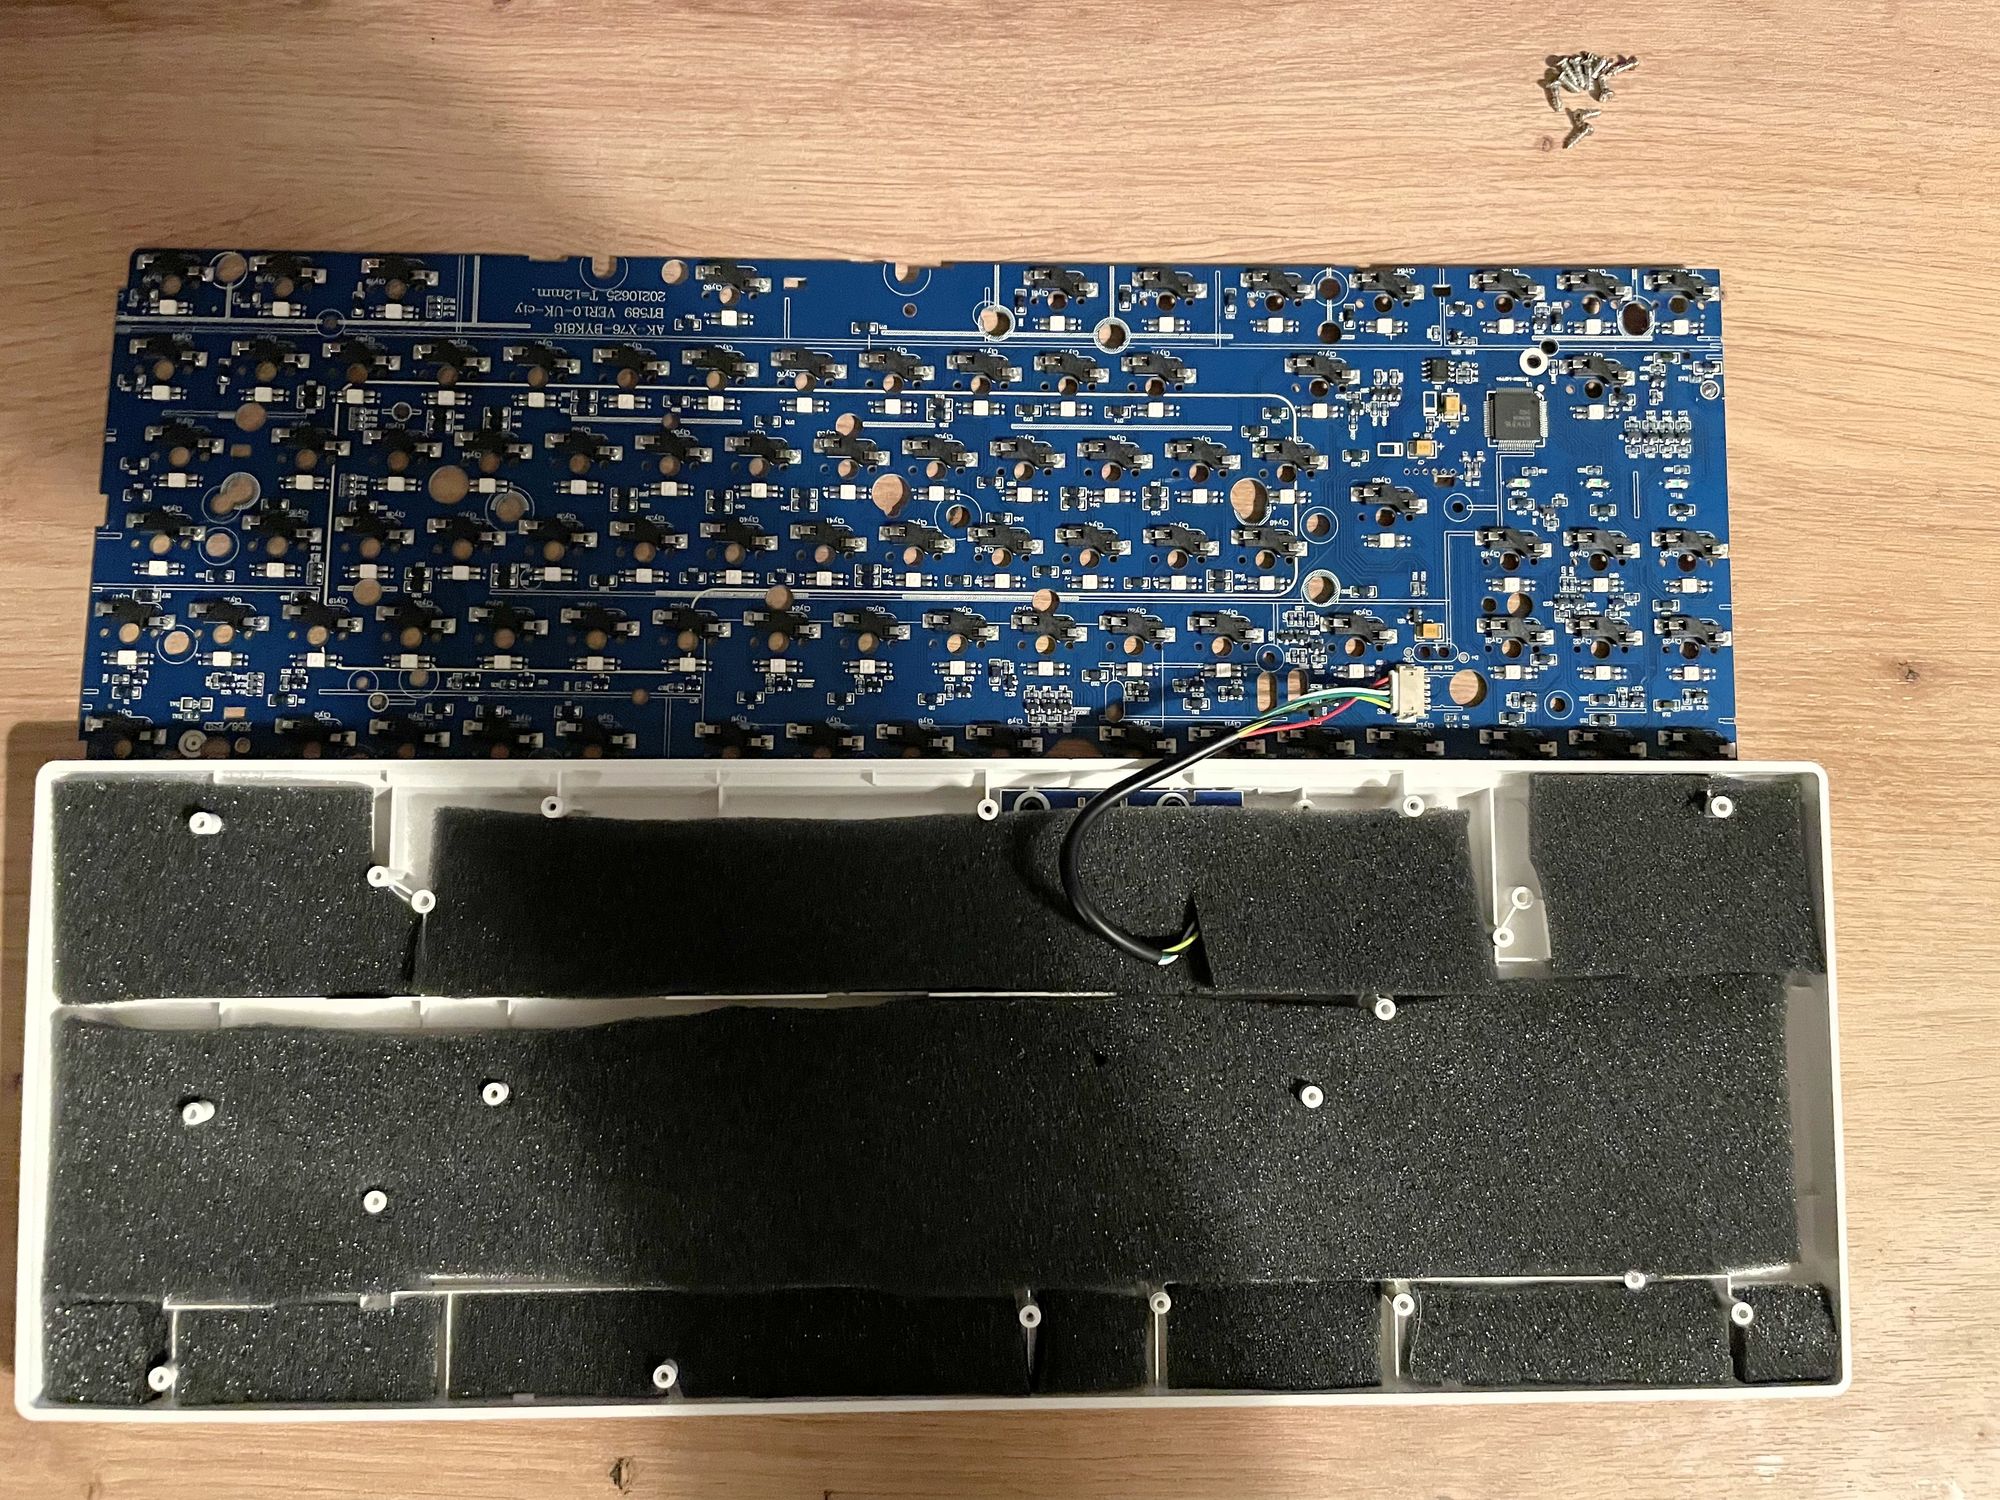
Tape Mod/Tempest Mod
The PCB also got some love. Putting some painters tape over the backside of the PCB will reduce shattering noises and make the PCB a bit stiffer.
Polyfill Mod
This mod should further isolate the switch sound and make the keyboard overall less hollow. Initially, I was planning to cut some sponge foam to size and put it between the switch plate and PCB. But, I discovered some pre-cut stickers that are doing the trick and stick to the switch plate.
Stabilizers
Stabilizers are these plastic/metal bridges that are on bigger keys like Space or Enter. The stabilizers on this board are so good and well mounted, that I haven't touched them.
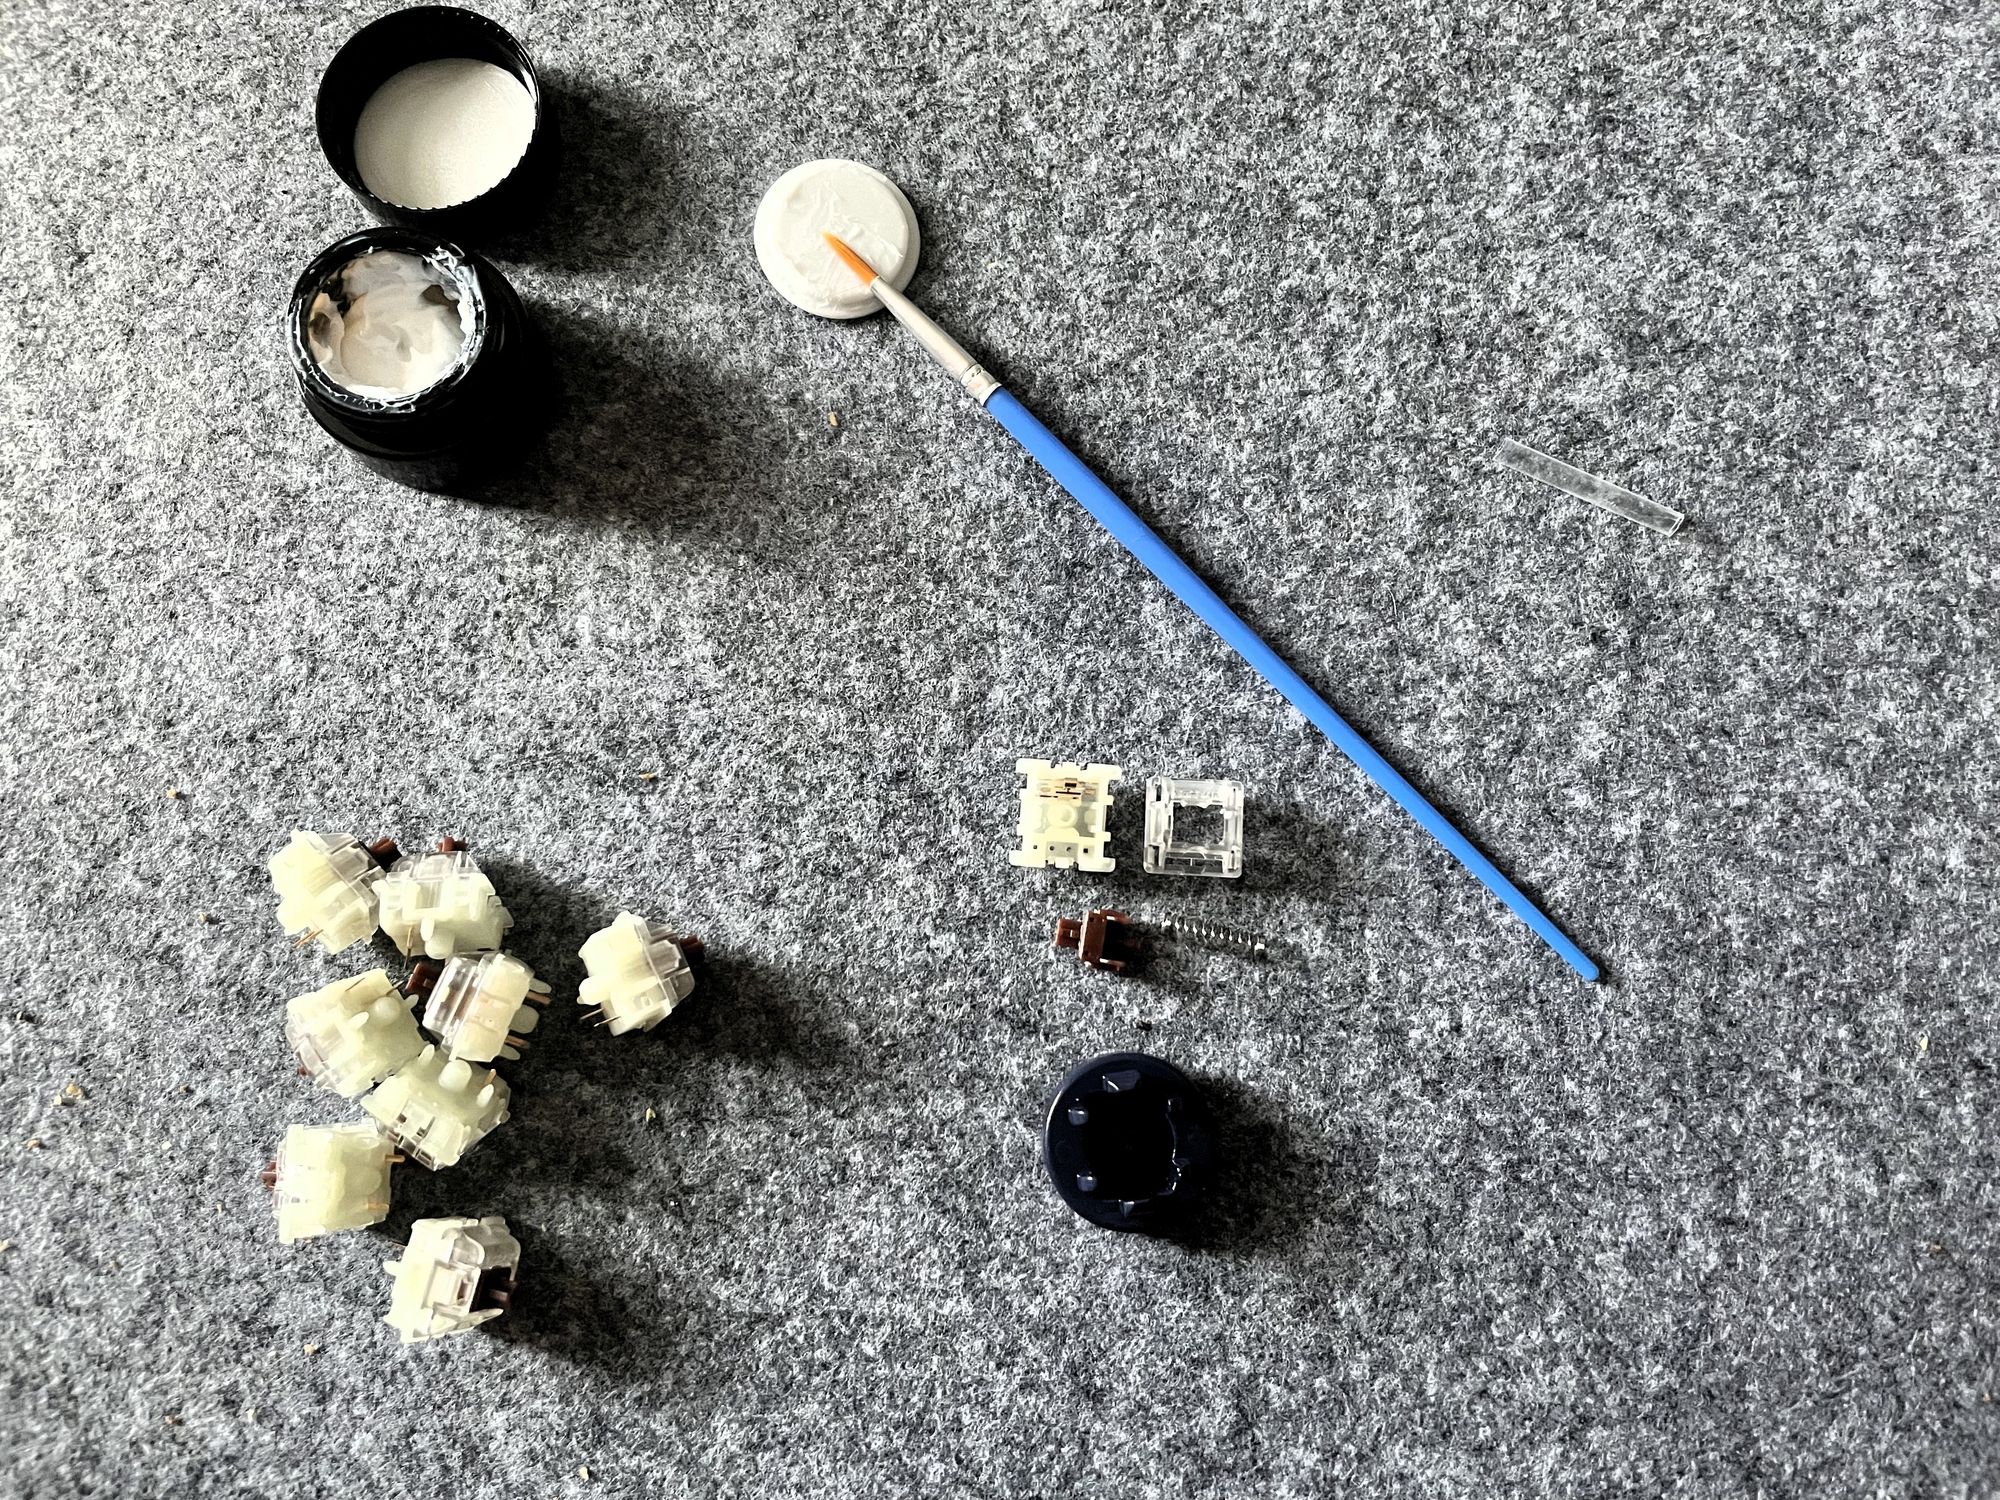
Lube
Tactile switches, especially the Gaterons tend to have a "spring ping" sound. It's basically a high-pitched sound that can be heard even outside a keyboard. To reduce this metallic sound, I lubed the switches. This also makes the travel a lot smoother and changes the sound profile a bit.
I disassembled each switch and carefully lubed the spring (very light overall and a bit thicker at the ends). I also lubed the stem, but took care not to lube the side with the 2 noses for the tactile feeling.
Assembly
Finally, it was assembly time. Connect and place the PCB, screw down the switch plate and carefully place in all switches. Afterward, plug on the brand new keycaps and attach the magnetic cover. Lastly, connect the new cable and give it a test.
Verdict
After a bit of testing and using the new keyboard for this article, I am briefly surprised how well everything went. It took me around 10–12 hours of research and maybe 4 hours for the build.
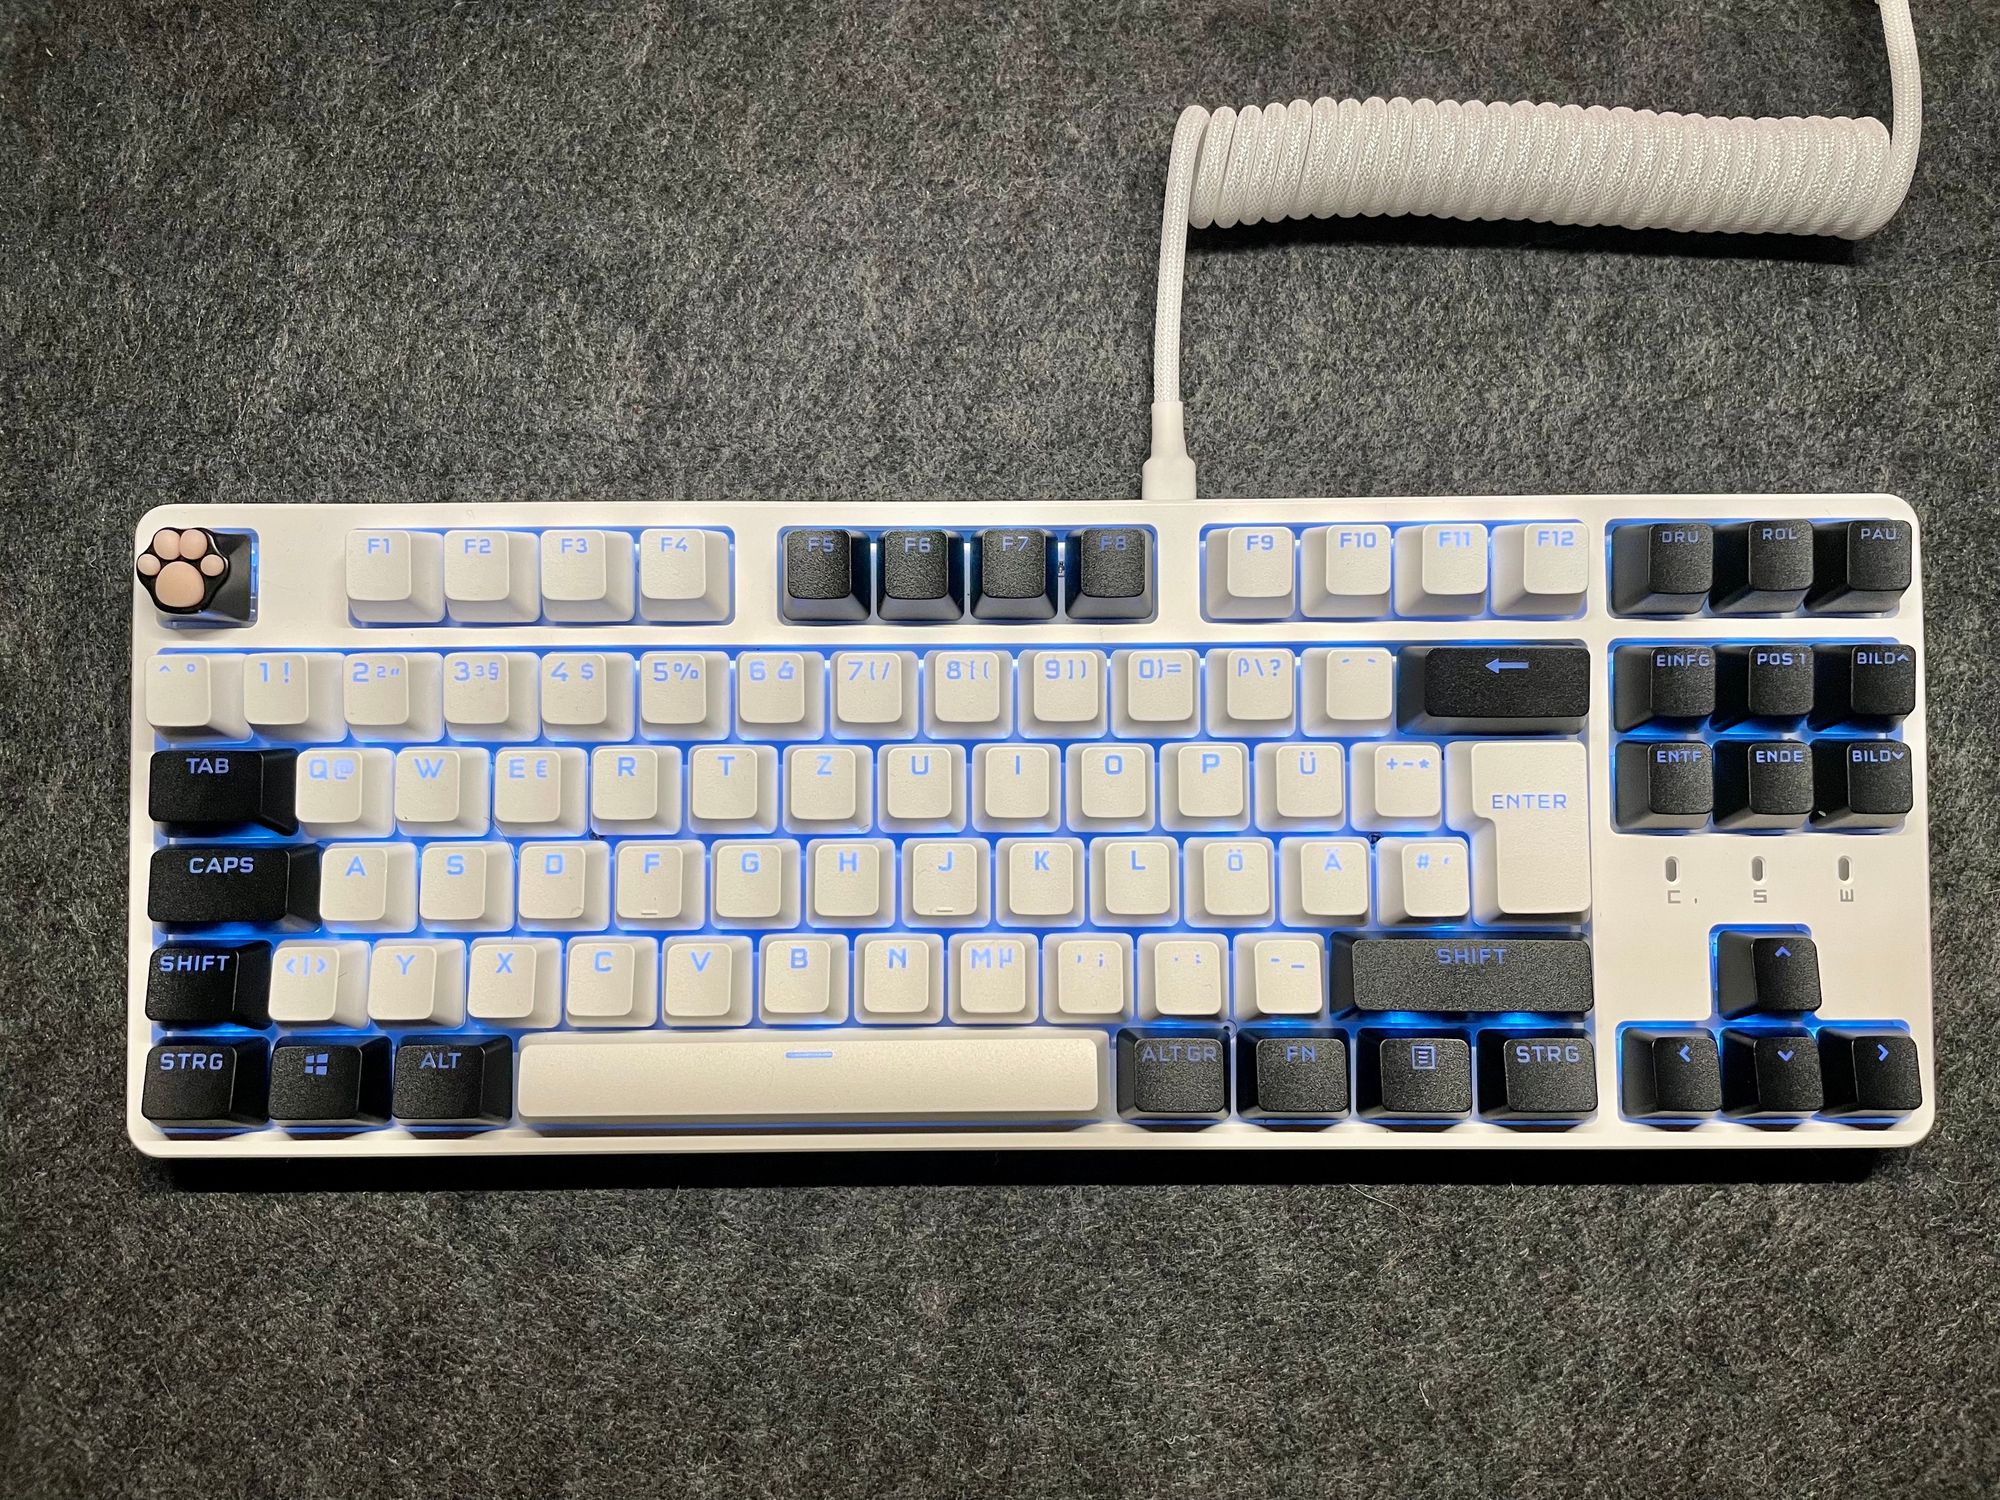
Look
The overall look is very nice, and the board is now named "Storm Paw" a little play on the paw escape key and the color scheme resembling the Star Wars Stormtrooper colors.
Sound
The sound is not exactly what I wanted. Don't get me wrong, it is really enjoyable, but maybe it is still a bit too loud for the office. I will have another look when the Cherry MX Clears will arrive.
Feel
Dang, this thing feels impressive. The slightly textured keycaps are very comfortable, and the tactile switches are doing their job. It might be a tad too less weight for my taste, but this will be tested with the Cherry MX clears, too.
Further improvements
Sooo, what else can be changed? What's the plan for the future? Well, I will try out the Cherry MX Clear switches for sure. I am already used to them from my previous keyboard, so they might be a fitting.
I also want to have another look at the foaming parts. There are still a lot of gaps that allow sound to travel around. There is also a chance, that decoupling the switches itself from the PCB has some impact.
Lastly, I am on the hunt for some even better keycaps. Something cozy, maybe a bit greenish, would be awesome.
Docs & Links
During my research, I stumbled over some very awesome websites that helped me to understand the topic a bit better. I want to share these with you.

Conclusion
Being in the beginner position again was a pleasure. Ages ago I did some miniature builds, and the whole keyboard tinkering was reminding me of this. I learned a lot and there is way more to dig into.
I don't want to go down the rabbit hole entirely, but I would love to hear your ideas and feedback. Do you do keyboard builds? Which kind of switches do you use? Do you recommend a specific mod to silence a keyboard entirely


