Spotlight - Cockpit Project
Linux is about "using the terminal", right? Maybe not. Cockpit provides an option, so you can operate your GN/Linux based operating system, even if you don't know the correct commands for many tools.

Linux is about "using the terminal", right? Maybe not. Cockpit provides an option, so you can operate your GNU/Linux based operating system, even if you don't know the correct commands for many tools.
Configuring the firewall, checking the performance or adding a disk and much more can be done with Cockpit. Let's check it out.
Motivation
Why should one use a graphical interface for server administration anyway? That's not as easy to answer for some people, but there are a lot of reasons.
You may have a co-worker, that is not as experienced with some commands or somebody who is currently migrating from Windows administration and getting to know Linux based systems. Sometimes, it is also easier to get some information at a glance or do something without digging into command line documentation for a tool (looking at you virsh). Let's be honest: Not all of us are experts for all parts of the GNU/Linux ecosystem.
In the end, we are human and very used to graphical feedback and graphical information. A well-made interface (on CLI, too) will please us more than hard to interpret or remember commands. But even if we enjoy the command line and the power of it, there are others that won't.
Support
Cockpit does not have the typical support or release lifecycle. It is considered one of the core utilities for Red Hat Enterprise Linux, Alma Linux, Rocky Linux, CentOS Stream and Fedora and gets a lot of support from the distributions. In addition, Cockpit is available on many other distributions, but I am not sure about the support there.
You can expect to get support for a given Cockpit release from the distribution of your choice and the Cockpit project itself.
There are regular updates provided by the team. You can always find somebody in the IRC (#cockpit on libera.chat), too. The documentation is quite helpful. In the past, the GitHub repository has seen a lot of attention and issues with SELinux or Cockpit itself were taken care of without problems for me.
Installation
Installing Cockpit is really easy and straight forward. You need to install some packages that are available for all Fedora, CentOS or RHEL derivates/clones.
# Install cockpit

$ sudo dnf install cockpit
Cockpit also needs a socket enabled, so it can activate if somebody is requesting a connection.
# Enable Cockpit socket

$ sudo systemctl enable --now cockpit.socket
If you are having firewalld enabled, you also need to add the Cockpit service, so you can query the website.
# Allow cockpit in the firewall

$ sudo firewall-cmd --add-service=cockpit
$ sudo firewall-cmd --add-service=cockpit --permanent
Afterwards, you will be able to query the Cockpit page with your browser of choice (https://IPADDRESS:9090) and login with the credentials of the machine.

If you want to install Cockpit on Debian, Ubuntu, ArchLinux or Open Suse, please check out the installation guide.
Features & Functions
Now that the installation is out of the way, you can check the features with me and test them in your setup.
Integrated
Cockpit is using existing APIs instead. That means, you can switch between the Cockpit and your shell and get the same information. If you change the timezone in Cockpit, it will be changed on the host the same way as using the timedatectl command.
This also means, that you don't require special configuration files or a database to store Cockpits state.
You can also use all of your existing tooling like Ansible, shell scripts and what not. Cockpit will not enforce a "somewhere stored" status, that it knows, but only change something, if you request it.
Web UI
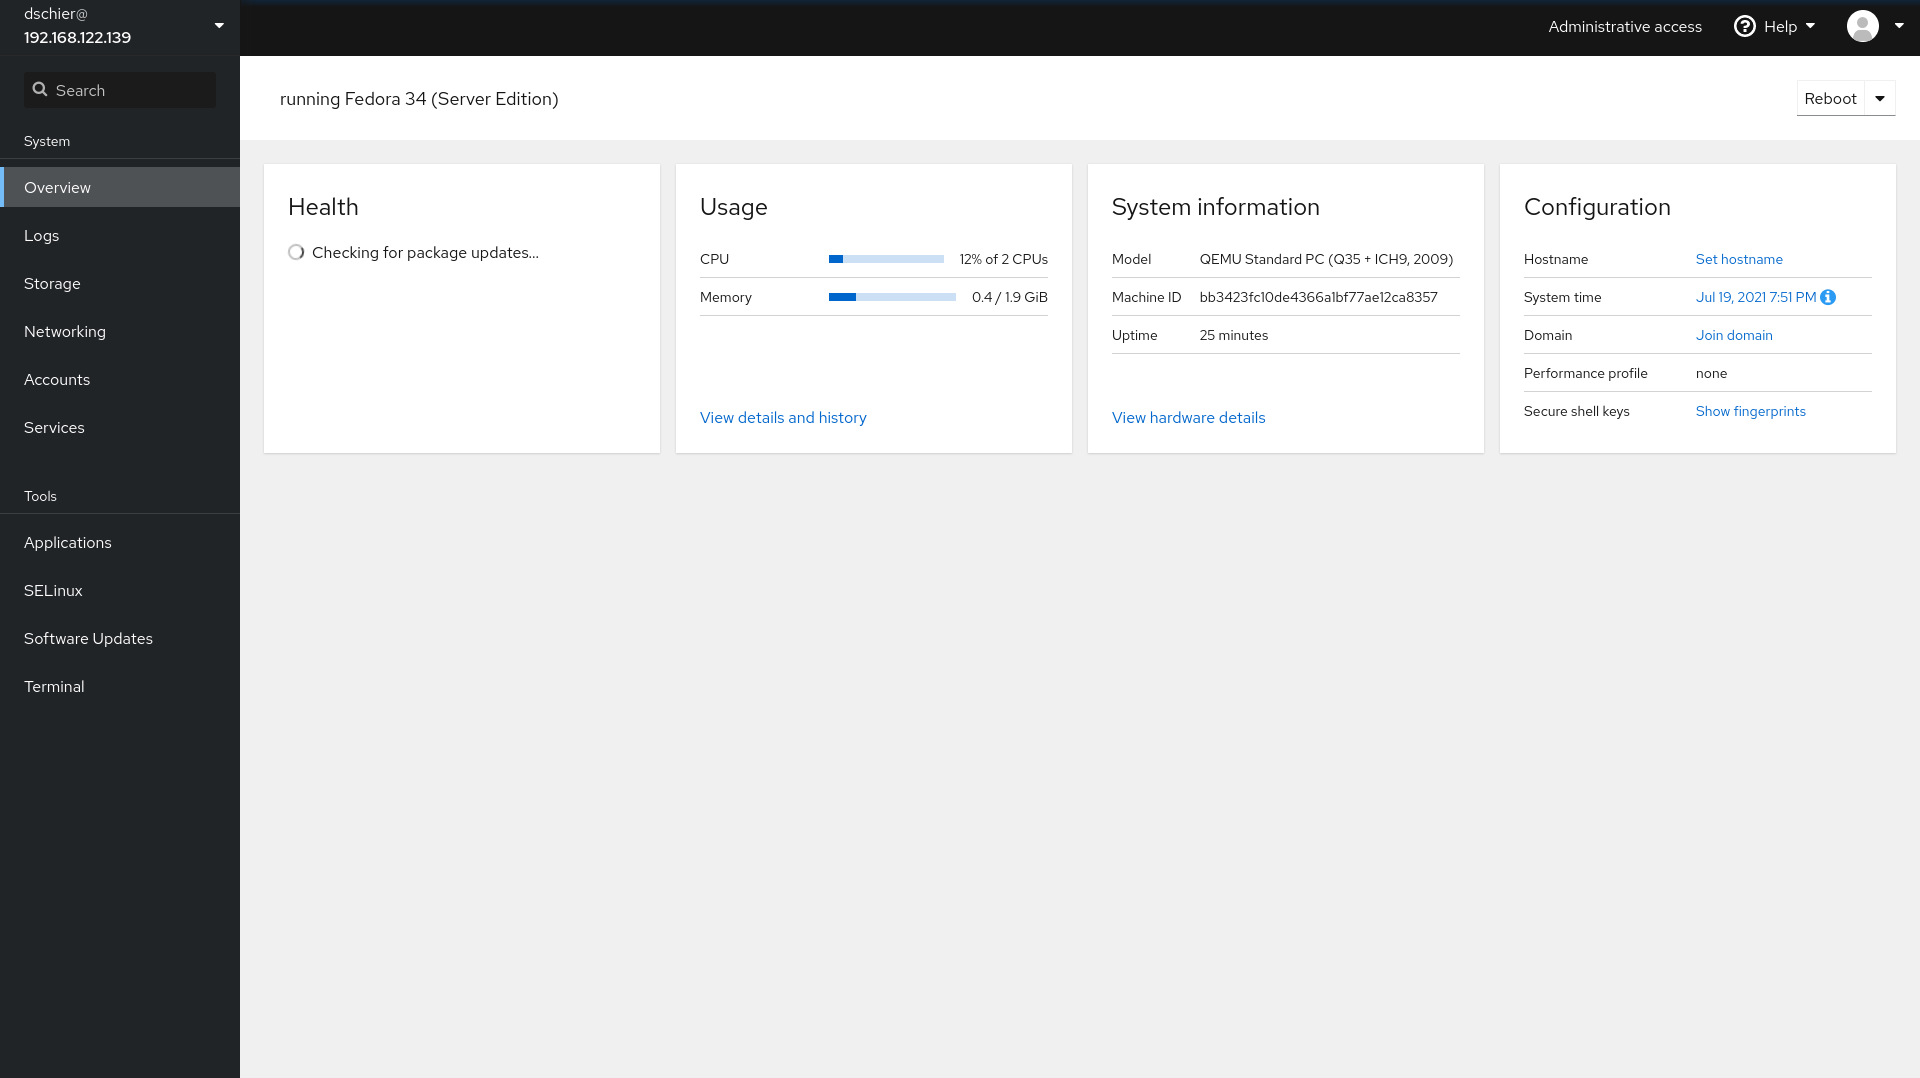
The most prominent feature is the Web UI. It is based on the Patternfly framework and is intended to provide information in an easy-to-read and discoverable way. You can think a bit of a Desktop Interface for your server.

You will get Hardware information or performance metrics (with optional persistence) out of the box. In recent releases, these metrics can be used by Grafana, too.

But, there is way more to discover. Adding or adjusting network interfaces or firewall rules is covered. Manipulating Storage devices is also something, you can do. You can check running services, logs or apply patches. There is even a built-in terminal, if you need it.
Applications & Integrations
Cockpit is very application centric and can be extended with more features. This means, you can add support for Podman or KVM with just a few commands.
# Install podman support

$ sudo dnf install cockpit-podman

# Install kvm support

$ sudo dnf install cockpit-machines
The result is, that you can manage your containers or virtual machines in Cockpit, too.

There is even more. If you want to know more about the current SELinux status or the latest errors, you can install cockpit-selinux. Kdump support is there via cockpit-kdump, too.
Via 3rd party applications, you can get even more features. You can check out the list of available applications here.
Contributing
Open Source is all about contributions, yeah? Cool. Contributing is very easy and can be done with simple bug reports, feature requests, testing new features or helping with the code. For me, this is a very important topic and I already covered it in a dedicated article. If you consider using Cockpit for your project, please also consider to check out the contributing guide and support the project.
Links & Docs
There are many very helpful links to see how Cockpit can be used and how it integrated in other software. Below you can find a small list.


Conclusion
Cockpit is easy to use, simple to install and provides real benefits to every new Linux administrator or operator who is not deep in the command-line-fu. For me, it is perfect for small setups, where I don't need or want complicated management software or just want to allow junior operators to get things done.
Do you consider to use Cockpit? What are you missing? Please feel free to get in touch with me via Twitter, Mail or LinkedIn.


