AlmaLinux OS - Kiosk Mode
You might have seen these displays where a video is played endlessly, an ad is shown on repeat or some useful data is made available for everybody. Or, have you used an ATM, a library PC or an info terminal? All of these are considered Kiosk solutions.

You might have seen these displays where a video is played endlessly, an ad is shown on repeat or some useful data is made available for everybody. Or, have you used an ATM, a library PC or an info terminal? All of these are considered Kiosk solutions. Guess what, this can be useful for all kind of IoT use cases, home usage or your own monitor wall.
In my case, I am currently building a smart mirror/digital picture frame application and wanted to run it in such a kiosk. So, let's get our hands dirty and make a Kiosk solution, based on AlmaLinux OS, Rocky Linux, RHEL, Fedora, or CentOS.
Kiosk Mode
Before digging into the technical details, let's talk about Kiosk mode. In general, we are speaking about Kiosk software. This indicates a software that is designed for an interactive kiosk or Internet kiosk. It is enclosing the system in a way that prevents user interaction and activities on the device outside the scope of execution of the software.
Typically, the implementations allow access to a single software, which is customized to fill the entire screen and cannot be stopped from running. Also, in most cases, you don't need an extra system login.
Our Kiosk project
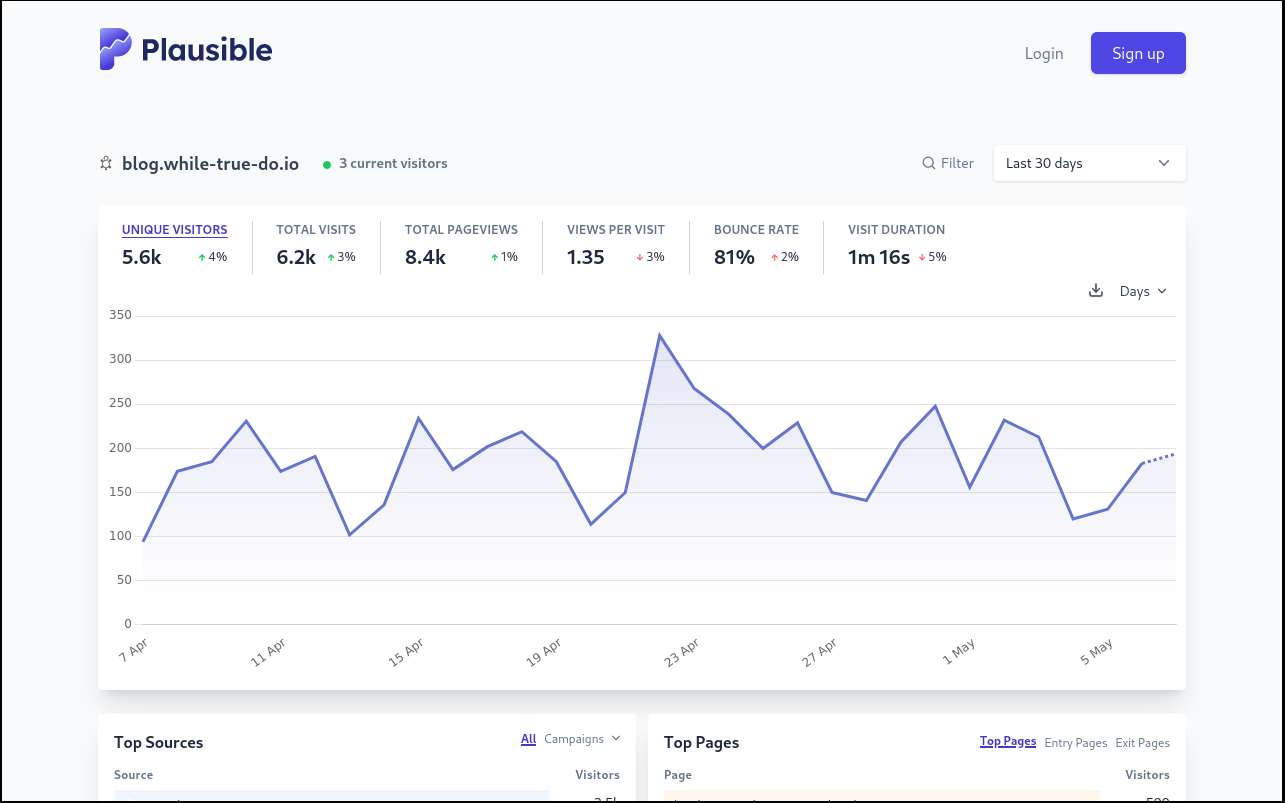
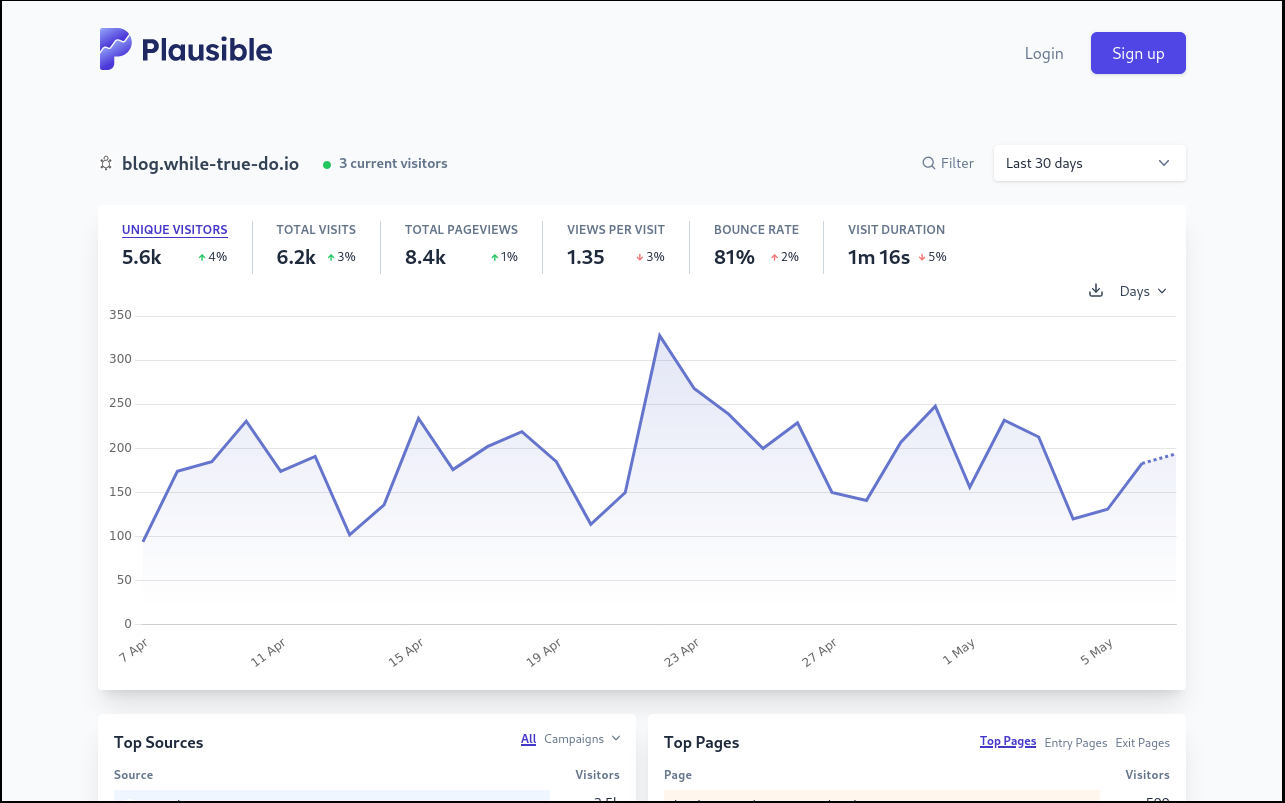
For this article, I have chosen a simple Kiosk setup. I want to have a Raspberry Pi, connected to a display and optionally a mouse. On this display, I want to have my blog traffic statistics displayed.

After boot-up, I don't want to log in, select a browser or whatnot. Just show me what I want to see.
Setup
Let's install some packages, copy configurations and just make it brrrr. Ready? Here we go.
Kiosk packages
First, we need to install some packages. Fortunately, all Red Hat family distributions offer these packages without any additional repositories. So, a simple command will take care of this.
$ sudo dnf install gnome-kiosk gnome-kiosk-script-session gdm firefoxThe gnome-kiosk package provides a lightweight variant of the GNOME Shell, whereas the gdm package provides the GNOME desktop manager. Both are sufficient to log in and start a simple shell.
Raspberry Pi Specialties
In another article, we talked about Raspberry Pi and AlmaLinux OS. There is some minimal tuning needed to even start graphical sessions, as described in this article, on a Raspberry Pi 4. I am not entirely sure if this is needed for Raspberry Pi 3 or 5, but discovered this is related to a driver/firmware issue, which can be fixed by editing the file /boot/firmware/config.txt.
dtoverlay=vc4-fkms-v3d/boot/firmware/config.txt
The change will be applied after a reboot.
User creation
Next, we will need a user that will run our Kiosk. This user shall not have any special permissions, nor a password. Creating such a user is also pretty easy.
# Create user
$ useradd --create-home kiosk

# Remove password
$ passwd -d kiosk
And that's already it. Well ... almost. It might be a good idea to check the sshd service and ensure that users without a password cannot log in.
# Ensure that Empty Passwords are not permitted
$ sed -i 's/.*PermitEmptyPasswords/PermitEmptyPasswords no/g' /etc/ssh/sshd_config

# Restart sshd
$ systemctl restart sshd.service
And that's it. Our user is ready.
Configuration
We also require a bit of configuration, so that everything works as expected. First, let's create a file that will log in our user automatically. Open the /etc/gdm/custom.conf file and ensure it looks like the below.
[daemon]
AutomaticLoginEnable=True
AutomaticLogin=kiosk

[security]

[xdmcp]

[chooser]

[debug]
/etc/gdm/custom.conf
Next, we should configure our desired session. This can be done with another configuration file /var/lib/AccountsService/users/kiosk. In this file, we will tell GDM that the gnome-kiosk-script session should be executed, when the kiosk user logs in.
[User]
Session=gnome-kiosk-script
SystemAccount=false
/var/lib/AccountsService/users/kiosk
This session requires a script at a specific location. For our use case, we want to run the Firefox browser, which we installed above, and call the desired page. I am using the publicly available tracking dashboard for my blog. To do so, we demand a directory in the kiosk home directory.
# Create the necessary directories
$ mkdir -p /home/kiosk/.local/bin /home/kiosk/.config /home/kiosk/.cache /home/kiosk/.mozilla
$ chown -R kiosk:kiosk /home/kiosk/
We also demand a script, namely gnome-kiosk-script in the /home/kiosk/.local/bin/ directory.
#!/bin/sh
while true; do
    firefox -kiosk https://plausible.io/blog.while-true-do.io
    sleep 1
done
/home/kiosk/.local/bin/gnome-kiosk-script
The loop takes care of situations where a user might have killed Firefox, or it crashed. This script needs to be executable. So we have to change the permissions accordingly.
# Make executable
chmod 0755 /home/kiosk/.local/bin/gnome-kiosk-script

# Ensure correct permissions for /home/kiosk
chown -R kiosk:kiosk /home/kiosk
This should be it.
Enable Kiosk Mode
There is one more thing, we need to take care of. When rebooting a freshly installed AlmaLinux, it might not start in graphical mode and therefore, never come up with our desired Kiosk mode. Two more commands, and we are ready for a reboot.
# Enable gdm
$ sudo systemctl enable gdm.service

# Ensure to boot in graphical mode
$ sudo systemctl set-default graphical.target
Reboot the machine, and you should be greeted with the following picture.

Script
In case you want to skip all the reading, or integrate such a setup with the AlmaLinux Cloud-Init approach from another article, I want to share a script.
#!/usr/bin/env bash

# Install Packages
dnf install -y gnome-kiosk gnome-kiosk-script-session gdm firefox

# Enable auto Login
cat > /etc/gdm/custom.conf << EOF
[daemon]
AutomaticLoginEnable=True
AutomaticLogin=kiosk

[security]

[xdmcp]

[chooser]

[debug]
EOF

# Create user
useradd -m kiosk
passwd -d kiosk

# Configure user session
cat > /var/lib/AccountsService/users/kiosk << EOF
[User]
Session=gnome-kiosk-script
SystemAccount=false
EOF

# kiosk script
mkdir -p /home/kiosk/.local/bin /home/kiosk/.config /home/kiosk/.cache /home/kiosk/.mozilla

cat > /home/kiosk/.local/bin/gnome-kiosk-script << EOF
#!/bin/sh
while true; do
    firefox -kiosk https://plausible.io/blog.while-true-do.io
    sleep 1
done
EOF

chown -R kiosk:kiosk /home/kiosk/
chmod 0755 /home/kiosk/.local/bin/gnome-kiosk-script

# Enable graphical mode
systemctl enable gdm.service
systemctl set-default graphical.target
The script is intended to be executed as the root user.
Docs & Links
The Kiosk mode is somewhat unknown, yet very powerful. I want to share at least the documentation I used.


Conclusion
Kiosk modes can be useful for visual dashboards, automatic video players, advertisements in a shop window, IoT or at home. Build your digital picture frame, monitor wall or even user terminal with it. It's easy to set up, runs on a Raspberry Pi or basically any PC that can attach a monitor.
With some peripherals like touch input, a mouse or keyboard, you can also allow interactive usage.
Have you ever wanted something like a Kiosk mode? Are you already running one? I would love to hear your story.


