Fedora - Home Server (Container)
In the last articles we tackled virtualization, which is perfectly fine, if you want to run full-fledged virtual machines. On the other hand, you can use containers to deploy workloads very easily. So, let's have a look how we can integrate this in our home server.


In the last articles we tackled virtualization, which is perfectly fine, if you want to run full-fledged virtual machines. On the other hand, you can use containers to deploy workloads very easily. So, let's have a look how we can integrate this in our home server.
Intro
This series is explaining how we are setting up a home server from scratch. You can find links to the previous articles below.
- Intro & Concept
- Hardware & OS
- Automation
- Management
- Virtualization
- Container
- Time, DHCP, DNS Server
- Git Server
- File, Calendar, Contact Sync
- Application Dashboard
This time we want to dig into containers, Podman to be precise.
Containers
Containers are offering a perfect sweet spot between flexibility and complexity. They are pretty easy to use, and you can get things going quickly. Even more, you can run multiple versions of the same software in parallel. This makes it pretty handy for a lab, but also a home server.
Podman
Podman is a container engine that provides a daemonless option to run rootful and rootless containers. I want to use Podman (and not Docker or Kubernetes) for a small home server and lab for several reasons.
- easy to use
- integration in systemd
- Cockpit Integration
- Ansible modules existing
- suited for single server workload
If you aren't aware, I have also provided lots of articles about Podman, which will help you to get started and work with Podman and Containers in general.
Installation
Enough of the introduction, let's do something. As always, we will use Ansible to configure the home server. This time, we will install all the things at once, start some services and afterwards deploy a minimal container for testing purposes.
Install, configure, start
We will re-use the already known playbook (configure.yml) from our previous articles. If you don't remember how it looked like, you can check it out in the repository or the previous article.
We just need to add some new tasks at the end.
---
# ansible/playbooks/configure.yml

- name: "Configure Fedora Homeserver"
  hosts: "all"

  vars_files:
    - "../manifest.yml"

  tasks:

  ...SNIP...

    # Containers with Podman

    - name: "Manage podman Packages"
      ansible.builtin.package:
        name:
          - "podman"
        state: "present"
      become: true

    - name: "Manage cockpit-podman Packages"
      ansible.builtin.package:
        name:
          - "cockpit-podman"
        state: "present"
      become: true

    - name: "Manage podman SELinux Booleans"
      ansible.posix.seboolean:
        name: "container_connect_any"
        state: true
        persistent: true
      become: true

    - name: "Manage podman Socket"
      ansible.builtin.service:
        name: "podman.socket"
        state: "started"
        enabled: true
      become: true
      loop:
        - "podman.socket"

    - name: "Manage podman Timers"
      ansible.builtin.service:
        name: "{{ item }}"
        state: "started"
        enabled: true
      become: true
      loop:
        - "podman-auto-update.service"
        - "podman-auto-update.timer"
...
That's already it, really. We just need to run our playbook, as usual, and we can use Podman already. But, before doing so, let me explain one or two things.
The first task will install Podman. So far, so good.
The second task will take care of packages needed for Cockpit. This will allow us to manage containers and images in Cockpit.
The third task will ensure that published ports are reachable. Basically allowing Podman to open ports, which will be blocked by SELinux, otherwise. If you want to allow Podman to run privileged containers, you should add container_manage_cgroup, too.
The fourth task will start the Podman socket. This socket is needed to connect to Podman via Cockpit.
Lastly, we will start a service and the timer, that will take care of auto-updates. I explained this feature in the article "Podman - Auto Updates".
Now, let's run the playbook and see what's going on.
# Syntax Check the playbook
# To look for syntax errors without executing the playbook
$ ansible-playbook --syntax-check ansible/playbooks/configure.yml

# Dry-Run the playbook
# To check what will be changed
$ ansible-playbook -i IP_ADDRESS, -u USER -k -K --check --diff ansible/playbooks/configure.yml

# Run the playbook
# To really do the work
$ ansible-playbook -i IP_ADDRESS, -u USER -k -K ansible/playbooks/configure.yml
Afterwards, you should be able to perform some things.
- You are able to run
podman versionon the machine. - You are able to open IP_ADDRESS:9090, log in and check out Cockpit Podman Web interface.

If you want, you can already start playing around with Podman. I have published a couple of articles about Podman in the past, which will get you started.
Demo Workload
Okay, okay. This article will be really short if we don't do something useful with our new Podman installation. What about... deploying a demo workload, that showcases how Ansible's Podman modules are working? A simple web server will be sufficient for now, since we are doing some better workload in the next article already.
First, we want to create a new playbook. Let's name it deploy_hello_container.yml.
---
# ansible/playbooks/deploy_hello_container.yml

- name: "Create a Container"
  hosts: "all"

  tasks:

    - name: "Run rootful Container"
      containers.podman.podman_container:
        name: "hello_world"
        image: "docker.io/library/nginx"
        state: "started"
        publish: "8080:8080"
      become: true
...We also need to update our requirements.yml file to ensure that the new module can be installed and is documented.
---
# ansible/requirements.yml

collections:

  - name: "ansible.posix"
  - name: "community.general"
  - name: "community.libvirt"
  - name: "containers.podman"
...
Now, let's install the new modules and run the playbook.
# Install requirements
$ ansible-galaxy collection install -r ansible/requirements.yml

# Run the playbook
$ ansible-playbook -i IP_ADDRESS, -u USER -k -K ansible/playbooks/deploy_hello_container.yml
Afterwards, we can validate that the container is running in Cockpit.
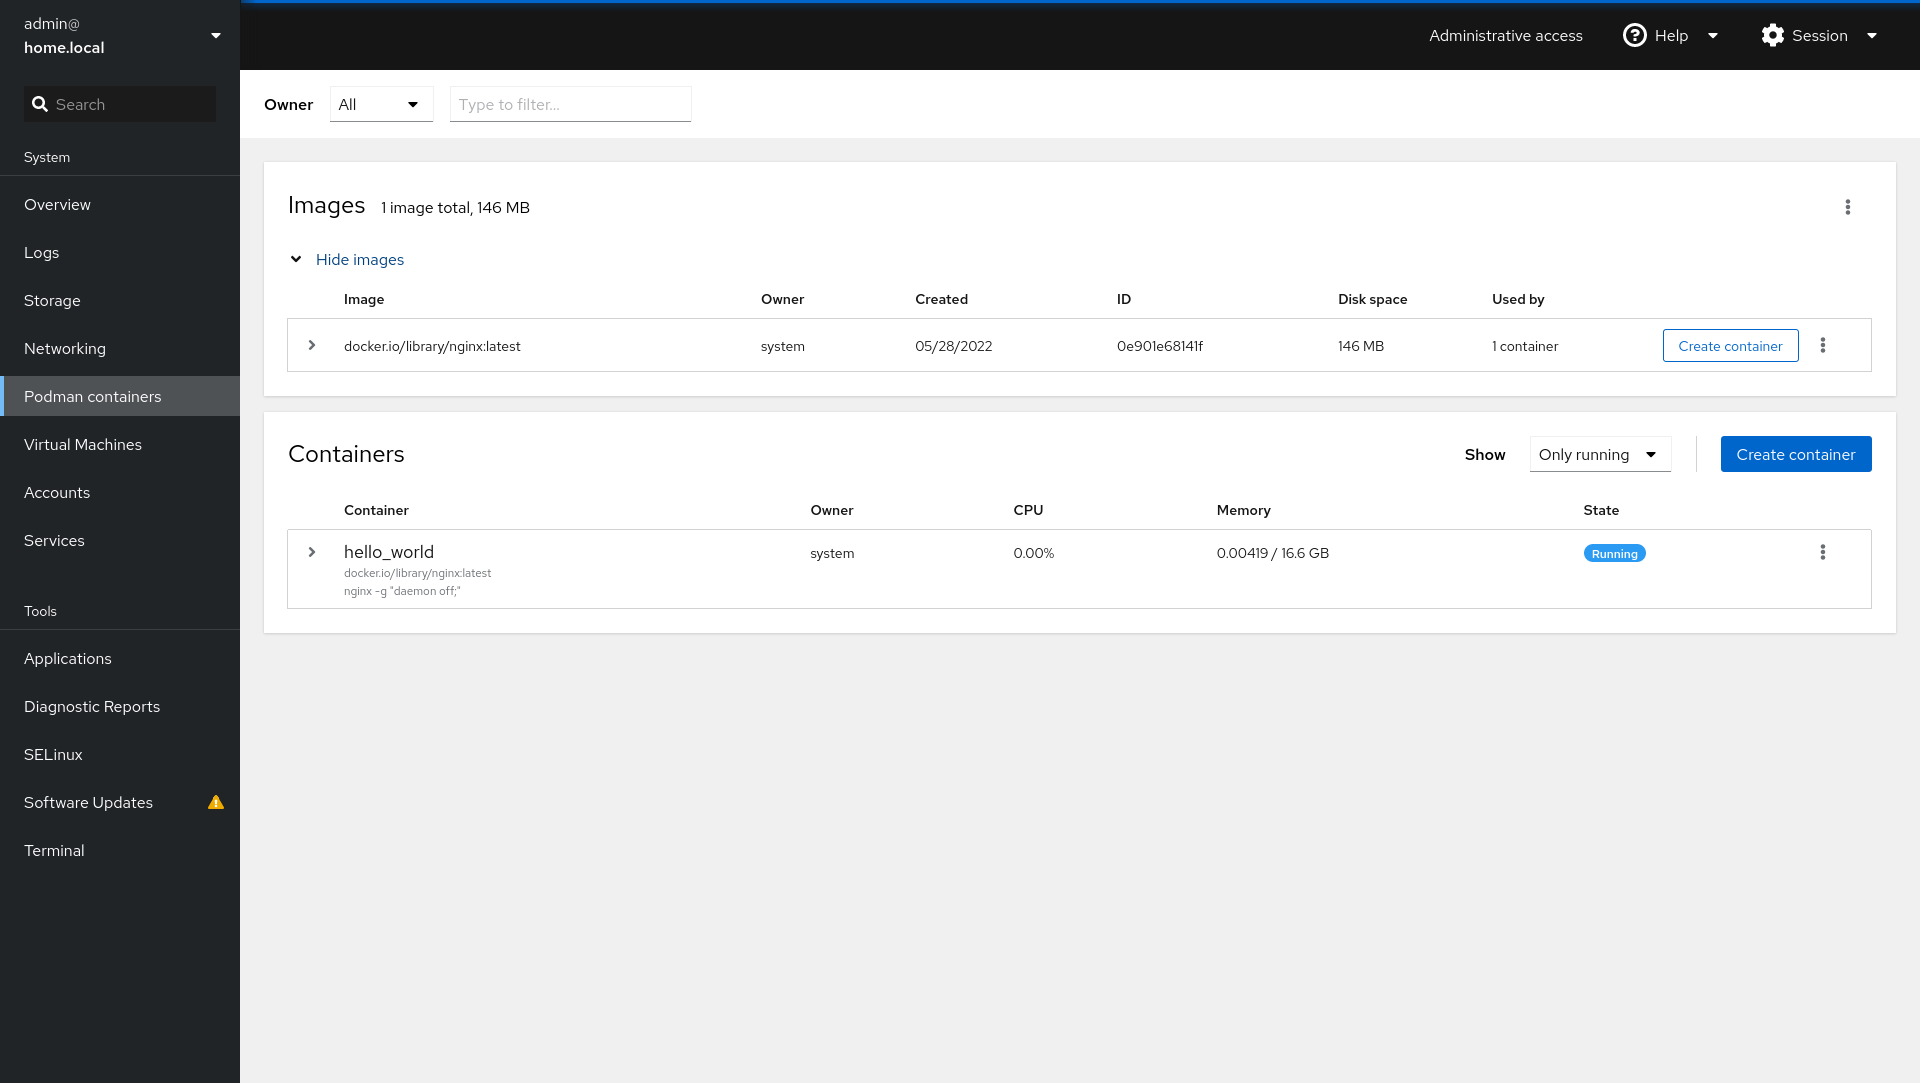
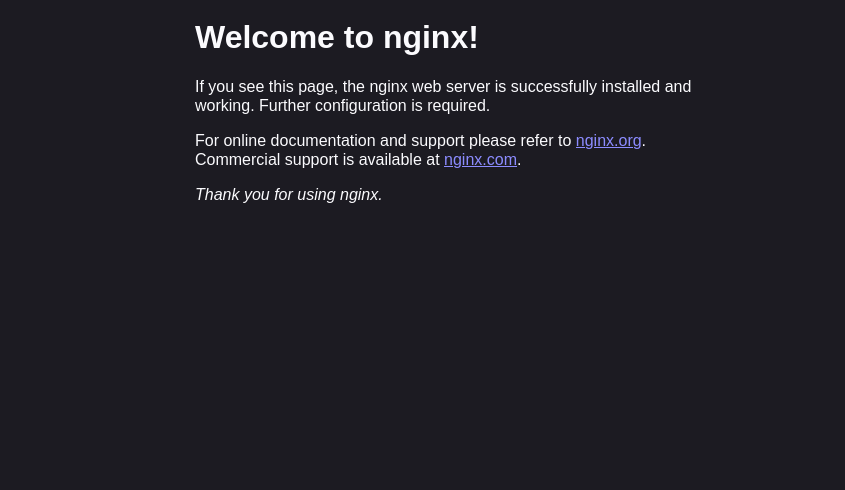
And we can open our home server on port 8080 to see the deployed web server.
This makes it very easy to deploy and maintain the documentation of new containers. =^.^=
Docs & Links
As always, here are some references and links that may be helpful to get a better understanding.

 Jack Wallen


 mahesh1b
Conclusion
That should do it for now. In the next article, we will deploy some real workload to our new container engine and make some use of our new capabilities.
Is there anything you like to test in containers? Have you ever worked with Podman? Are you aware, that there are cool graphical interfaces for Podman, other than Cockpit? Let me know if you want to see something special. :)
Continue
Please check out the next article of this series.
 Daniel Schier